Showing posts with label recipes. Show all posts

Friday, November 1, 2013

New England Clam Chowder

This is our favorite New England Clam Chowder recipe.

1 lb hickory-smoked bacon, cooked, drained, and crumbled (save 2 Tbl grease)
1 medium yellow onion, chopped
1/2 cup celery, chopped (optional)
1 BIG can clams (51 oz can. I use SeaWatch brand Chopped Sea Clams from Costco)
1 quart Half and Half
1/2 cup Ultra Gel thickener
4 medium potatoes, cubed and boiled
4 oz cream cheese softened in the microwave
1 Tbl basil
2 tsp salt

Drain clams and reserve the liquid.

Peel, cube, and boil 4 medium potatoes until tender. Drain and set aside. I use a 2 quart pot.

While the potatoes are cooking, fry (or oven bake) bacon, crumble or cut into pieces, set aside.

In a large Dutch oven, saute onion in 2 Tbl bacon grease (or use butter) until onion is translucent. (You can saute 1/2 cup chopped celery with the onion if you like celery). Leave in the pot.

In a blender, mix reserved clam juice with 1/2 cup Ultra Gel thickener until thick. You might have to adjust the amount of Ultra Gel to your likeness.

Add the clam juice to the sauteed onions and garlic.

Add 1 quart of Half and Half,  salt, basil, and the softened cream cheese. Heat until the cream cheese is melted.

Add the cooked potatoes.

Add enough Half and Half until you like the thickness of the chowder.

Just before serving add the clams and bacon. If you add them while the soup is cooking they will become rubbery (yuck!)

*****************  Notes *****************
You can add milk if the soup is too thick, or add more Ultra Gel if it isn't thick enough.

We usually serve corn bread along with our Clam Chowder, especially on Christmas Eve. This is our traditional Christmas Eve dinner.

If you have teenagers, you can cut down on the amount of bacon in the soup by leaving the bacon on the counter. They will come along and snack on a few pieces to save you the calories!


Friday, October 5, 2012

Salsa Verde

Salsa Verde
I've got great friends and neighbors! Two friends had more than enough tomatillos this year and shared the rest with me and one of them had a recipe for Salsa Verde.

The last batch of red salsa I made wasn't hot enough for Fly Boy or Son1, so this time I left some of the seeds in .... we'll see what they think now!

This recipe comes from Carol Jean Gibson who is an economist at the Utah State Extension Service.

Yes, I use a steam canner. The FDA says no, but Utah State Extension Service says it's okay with precautions. You can find the info here.

Green Tomato Salsa
5 cups green tomatoes or tomatillos, chopped
1 1/2 cups long green chilies (Anaheims are a good choice), seeded and chopped
1/2 cup jalapenos, seeded and chopped
4 cups onions, chopped
1 cup bottled lemon or lime juice (must be botled to guarantee acidity)
6 cloves garlic, finely chopped
1 Tablespoon ground cumin (optional)
3 Tablespoons oregano leaves (she substitutes 1/2 cup well pressed fresh chopped cilantro)
1 Tablespoon salt
1 teaspoon black pepper

Mix, then bring to a boil in large pan and simmer 20 minutes (She simmered it for more like an hour and a half).

Before canning she runs it through the blender

Can in pints, 20 minutes with usual precautions.

I followed the directions, but forgot the pepper. It smelled wonderful while it was cooking on the stove!

My friend told me that you can substitute lemon or lime juice for vinegar, which I didn't know. Of course, it makes sense.

Here's how they stack up on the pH scale.
Lime Juice: 2.0-2.35
Lemon Juice: 2.0-2.52
Vinegar: 2.4-3.40

Tomatoes: 4.5

I might try substituting lemon and lime juices for vinegar more often. We like the citrus flavor alot in this house!

Friday, April 27, 2012

Another Corned Beef Experiment

Sheepy had some extra beef that she was willing to share. Meatloaf (Sheepy's bull) got a lot too playful with the cows. So he turned into.... something to eat. If you can't keep your horns where they belong, you're gonna end up with lead poisoning.

I recently bought a book (what else is new!)
A Guide to Canning, Freezing, Curing & Smoking Meat, Fish & Game by Wilbur F. Eastman Jr.

In our defense of buying books, we've always taught our kids that reading is like magic! If you can read, you can learn almost anything you want to learn. After being married for 30+ years we have books and bookshelves in every room in the house except some of the bathrooms.

This book looked like a great reference book so I decided to add it to our collection.

It happened to have a recipe for Corned Beef. (It really has 2 recipes, this one cures in the fridge). This recipe was much easier than the one that Sheepy sent me. (Here's my first and second posts about my first corned beef).

This recipe used salt, brown sugar, bay leaves, pepper corns, allspice, and cloves. Much easier than the last recipe!

All ready to put in the fridge. I hope "Meatloaf" tastes good!

It's been such a long month so far that I wrote "Ready 10 April". It should read "Ready 10 May"!

"Meatloaf" will sit in the brine for two weeks, instead of a week like the first corned beef. I have to shake it around and flip the meat every day or two to make sure that all the meat gets covered with brine.

Thanks for sharing, Sheepy! I'll let you know how it tastes.

Sunday, April 15, 2012

Recipe for Natural Leavening Yeast

Monday's Child left a comment on my post More About Pioneer Yeast and Cinnamon Roll Recipe. She had some trouble with her wild sourdough starter. I'm really no expert, but I love to read, research, and try things out. And I'm blessed with great friends who do the same thing.

I got this recipe from my friend. She uses a natural yeast that is different from Pioneer Yeast. The book she recommends is The Bread Baker's Apprentice. It's not a book I own.... yet. I am interested in trying this type of yeast to see if this type of yeast processes gluten the same way that the Pioneer Yeast does.

She also sent me to this site to read and watch the videos. Although I haven't had time to go through everything yet, I'm looking forward to it once we have the animal situation fixed.

I haven't tried this recipe, but my friend used it to start her yeast and she loves it!

Original Fast Foods

Here's the recipe my friend sent me:
Day 1: 1 cup coarse ground or dark rye; 1/2 cup unsweetened pineapple juice (I bought frozen concentrate). Make it into a ball, using your hands. Press it down into a glass beaker (canning jar) and put tape on the side so you can see if it rises at all. (Probably won't on the first day.) Cover with plastic wrap and leave at room temp for 24 hrs.

Day 2: 1/2 cup of the rye; 1/4 cup pineapple juice. Same procedure.

Day 3: 1 cup unbleached high gluten or bread flour; 1/2 cup room temp water. Look for maybe a 50% rise. May smell fermented. Don't worry. Discard half of the starter and mix the remaining half with the day three ingredients. Cover with plastic and leave at room temp for 24 hours.

Day 4: 1 cup bread flour; 1/2 cup water at room temp. Sponge should have doubled in size; more is better. If still sluggish and hasn't doubled, allow to sit another 12 to 24 hours. Otherwise, discard half and add the day 4 ingredients. Cover and ferment until it doubles in size. May take 12-24 hours. Okay if it triples, but it will not be able to sustain that much of a rise, so expect it to fall.

Barm: 1 cup seed culture (above); 2 cups water at room temp.; 3 1/2 cups bread flour. Make sure all flour is hydrated and seed culture is evenly spread through the mixture. Put in clean glass or plastic container and put tape on side to measure rise. Allow to ferment for 6 hours or until bubbly. He says not to breathe in the fumes if the plastic inflates with gasses from the fermentation. Mine didn't inflate. Replace cover and refrigerate over night and you can use it the next day. It is potent for three days and then needs to be refreshed.

Refresh: Use or toss 1/2 and then add enough flour and water to AT LEAST double the total amount of barm. If you have a cup left make sure you double it to 2 cups, or even more.

You can use the barm you would be tossing out to make sourdough crackers. Google it. They taste great. My kids love them.

Thanks for your comments. I love hearing from you.

Sunday, March 11, 2012

More About Pioneer Yeast and Cinnamon Roll Recipe

I've gained about 4lbs this week because I've been experimenting with bread. Since I haven't eaten wheat in about 10 years, it has been a wonderful treat for me!

Sheepy's been experimenting, too. Her first loaves were a huge success. Light and fluffy and wonderful! The next four batches were bricks. Even the goats wouldn't eat them.

I had a big 'breakthrough' last Sunday when I promised Vet2Be I would make him rolls.... and I found out I had no store-bought yeast. All I had was the pioneer yeast sitting on the counter.

Since I had already mixed the liquids (eggs, buttermilk, water, sugar, and butter) I dumped in the pioneer yeast and then added the four.

Surprise! About 2 hours later it had risen enough to look like bread!

Yesterday I started some Cinnamon Rolls to bring to choir rehearsal on Sunday. I told Sheepy I would 'document the process' and post about it so she could see exactly what I do. (Being married to a scientist means I've learned to keep a lab notebook, complete with photos! It's now called a 'blog'.)

Not everyone uses a potato to proof the yeast, but we love potato bread, so that's what I do. This post includes the recipe, but realize that I don't use it 'by the book'. I often add a little more or a little less of liquid or flour to get the right consistency.

One potato diced in about 3/4 cup of water. Cook until potatoes are soft.
I added enough water to make about 1 cup, and then blended the potatoes.

Pioneer yeast ready to use in cinnamon rolls.
Here's where I did something 'wrong', but the cinnamon rolls turned out great anyway. I should have added just the yeast start, honey, and potatoes, then let it sit for a few hours. But I got distracted and added the egg and buttermilk, too.

I added about 1/2 cup buttermilk, 1 duck egg, 2 Tbls of butter, 2 Tbls of honey, and the potato puree. My breadmaker is then turned OFF, it doesn't go through a cycle at this point. I only let it stir the yeast into the rest of the liquids. You can do this in a mixer, too. I like my breadmaker, so that's what I use.
This photo was taken at 11:30 AM.

Let it sit and proof for about 2-4 hours. Whenever you get back to it is fine. This is what it looked like after two hours. I knew I wasn't ready to make bread yet, so I let this sit in the breadmaker until about 9:30 pm.
In this batch I used 4 cups of white flour and 1 cup of wheat flour. Turn on the breadmaker (or use a mixer) and knead for a minimum of 10 minutes. The dough is ready when it is smooth and elastic.

At this point I turn the breadmaker off. I really only use the breadmaker to mix and knead the dough. It does a good job, it's easy to clean, and if I forget about the dough it doesn't matter.

Sorry, I forgot to take a picture of the dough when it was done kneading.... sometimes I get on auto-pilot and just move onto the next step!

At this point I rolled my dough into a rectangle to make cinnamon rolls, but you could put it in a greased loaf pan, spread shortening on the top of the loaf, then set it to rise all night.
Spread the dough with softened butter, sprinkle on 3/4 cup brown sugar mixed with about 2-3 teaspoons of cinnamon.
Roll the long edge up.

Slice and place on a jelly roll pan that has parchment paper on the bottom. You can grease the pan if you prefer.

Put it in the oven overnight. I didn't turn the oven light on.

I completely forgot to take a photo of the cinnamon rolls in the morning before I put them in the oven. They were all raised and looked beautiful!

And then I forgot to take a photo of what they looked like coming out of the oven.

When I did remember to take a photo, the rolls were half gone!
This link has some good information about natural leavening. Cooking E-Z. However, I received a start from someone else instead of starting it from the yeast floating around in the air as discussed in the link.

This site is helpful, too, The Bread Geek blog. Since she one of the authors on the upcoming book called, The Art of Baking with Natural Yeast, it isn't overly helpful. 

I'm anxiously awaiting the book The Art of Baking with Natural Yeast by Caleb Warnock and Melissa Richardson. Caleb is the person I got my start from. I've pre-ordered the book because the author sites his sources of studies that have been done by the CDC and different universities that show that rapid-rise (instant) yeast processes the gluten differently than traditional (pioneer or natural) yeasts.

In the meantime I wanted more information on working with this old-style yeast. I thought that since this is a 200 year old strain of yeast, it would be a great idea to read an old cookbook from the 1800's.

My copy of Housekeeping in Old Virginia, originally published in 1979. Mine is a 1965 copy of the original.
You can find Housekeeping in Old Virginia free online at Internet Archives here.


The first chapter was titled, "Bread". It had the most helpful information I found on working with this type of yeast and recipes for bread, pancakes, waffles, rolls.... you name it.

After reading the first chapter I realized that starting my yeast with potatoes and proofing it is very similar to what cooks did 130+ years ago. No wonder my accident last Sunday ended up being a success!

The author also taught, "knead the dough for 30 minutes by the clock." This dough needs more kneading than the bread made from rapid-rise (or instant) yeast.

Knowing those two things have made my pioneer yeast bread turn out nicely every day this past week.

Please leave me a message if you've used natural leavening or pioneer yeast! I would love to learn from your successes!

Tuesday, February 28, 2012

Feeding the Yeast

I had to feed the natural yeast I got last week. It seemed to do really well. I haven't done anything with it yet... except feed it.

This is what my natural yeast looked like after growing for three days.  It smells really good, kinda sweet with only a very slight hint of sourdough smell.

Time to feed it! Add lukewarm water and stir. I added about 1/2 cup of water.

I added the same amount of fresh ground whole wheat flour. Fresh ground only because I didn't have any from the last batch of wheat I ground.

This is about the same thickness as the first batch that Mr. Warnock  mixed up for me. The jar is still a little less than half full of yeast.... or yeast mixture..... or whatever you call it.

This is about 1 hour after I fed the yeast. It has increased in bulk by a little less than half. It's bubbly and looks just like it's supposed to, as far as I can tell.

So far the yeast seems to be alive and well and growing. My first recipe will be pancakes since that seems the easiest to start with.

I'll let you know how it goes.

Monday, February 27, 2012

Corned Beef Update


Here's the corned beef just out of the brine. Not pink, I know, that's because I didn't use any 'pink salt' (sodium nitrite).

Onion, carrots, celery, corned beef, and the rest of the spices ready to cook in the crock pot. It looks yummy! And it smells wonderful!

Just finished cooking and ready to cut.
While I love cinnamon (and it was surprisingly tasty in the corned beef) it was a little too much cinnamon in this recipe.


The verdict: It was good. I'll probably make it again, but I'll use less cinnamon in the brine. 

Son1 liked it, too. He took the leftovers back up to school with him.

Friday, February 24, 2012

Natural Yeast?

Sheepy sent me a link to a radio program that talked about natural yeast, something I've never heard of before. (Self-Reliant Living by Preparedness Radio hopefully the link will be active for a little while. I've heard that the owners of the site don't always leave it up for free, so download the program if you don't have 90 minutes to listen to it.)

Sheepy knows I can't eat wheat because I'm gluten intolerant, but there are some people like me who can eat bread made with this kind of yeast.

It sounded so interesting that I listened to the 90 minute program the next day.

By that evening I had contacted the author of the book and picked up a natural yeast start. It's sitting on my counter growing. Apparently this strain of yeast is about 200 years old. That's old.

This is what it looks like this morning.
Nice and bubbly, just like it is supposed to look.
Natural yeast is very different from quick-rise yeasts that you buy in the grocery store. The way it acts on wheat is different, too. Apparently there have a been a few university studies done that show that this breads made with this type of yeast do an amazing job controlling your glycemic index. That's really important to Sheepy since her hubby has diabetes.

Caleb Warnock has a blog here. He doesn't talk much about natural yeast on his blog, but he has some good ideas about gardening and being more self reliant. He's also an authro and hosts writing workshops and classes in our area. Nice guy, too!

I bought a copy of his book from him last night, too, which he graciously signed. It's called the Forgotten Skills of Self-Sufficiency. It's a great introduction to self-sufficiency skills, it doesn't go into too much depth, but gives some good ideas on how to begin to grow gardens, keep chickens, and use natural yeast.

I haven't explored the Original Fast Foods site much at all, but Mr. Warnock gives their site as a reference in his book. The link to a discussion about the history of quick rise yeast can be found here.

For the next few days I'll leave my start on the counter, feed it, and watch it grow. If I can get a little more comfortable with the whole idea of using 1 1/2 cups of yeast starter in a batch of bread, then I'll give it a try next week and let you know how it goes.

Sheepy tried it. Her first batch of bread was great! But the next four batches went to the chickens (sad day!) So my job is to give this stuff a try and keep a 'lab notebook' (aka blog) to chronicle the successes and failures of using it.

Here is a video I found about starting your own yeast from raisins:


Sheepy told me she found a site somewhere on the internet that showed a woman who made all sorts of bread from different fruit starts. In the interview listed above Mr. Warnock mentions that the white-ish film on the outside of grapes and other fruits is yeast, so it makes sense (sort of) that you can grow yeast starts from fruit. Here's a blog I found that seems to show the process Sheepy was telling me about. Bread and Original Yeast. I've got alot of exploring and reading to do on that site!

If you've used this type of starter, please comment below and share some links! I'm sure there are great sites tucked in hidden spots on the internet that I haven't found yet.

Monday, February 20, 2012

Corned Beef

Sheepy made Corned Beef last week. She said she LOVED it. Then she smoked the leftovers and it turned into Pastrami!

She sent me the recipe from here (Michael Ruhlman), asked me to try it and post about it because she looses lots of links--but not mine.

I love corned beef so of course I wanted to give it a try. Son1 loves corned beef, too, and he'll be here for the weekend.

This is a 5 day process, so it's not fast. It will be ready to cook when Son1 is here.

I'll let you know how it turns out.

Here is all the prep work.

Making the Pickling Spice
 I used Michael's recipe, which he posted from a book he co-wrote called: Charcuterie: The Craft of Salting, Smoking, and Curing (it's on my wish list, now.)

I couldn't find any coriander seeds, mace, or cinnamon sticks at the store. My pickling spice doesn't have coriander or mace, but I added ground cinnamon after I toasted the other spices.
Toasting the spices was easier than I thought and only took about 5 minutes. It smelled wonderful!
Next grind up the toasted spices. My mortar and pestle are small so I did it in three batches. I almost plopped the whole batch in the blender instead and pulsed it, but I decided to grind it by hand so the chunks would be a bit bigger.

Making the Brine
I only found a small roast so I did a half batch of brine. Clockwise from the top: 2 tablespoons pickling spice, 1/4 cup sugar, 3/4 cup kosher salt (non-iodized), and 3 garlic cloves crushed (that's twice the amount that the recipe calls for, but we love garlic!)
Add 1/2 gallon of water and bring to a simmer to dissolve the sugar and salt. (I don't have sodium nitrite - pink salt- right now. Hubby is recrystallizing some from the lab so if it gets done in the next day or two, I'll add it to the brine. It isn't a necessary ingredient, so I didn't feel too bad about leaving that one out.)
Let it sit on the counter until the brine is room temperature. I only have one big pot so I transferred the brine into a stoneware bowl.
Put in a beef brisket (I couldn't find one at the store, so I used a roast. Too bad because he said that this works best with cheaper cuts of meat). Put a plate on top to keep the meat submerged. Cover and refrigerate.....
for 5 days!!

It's sitting in the garage fridge right now.

I can hardly wait until Saturday to cook it and see what it tastes like!

Tuesday, October 4, 2011

Chevre

One of my friends wanted to see how I make Chevre, so even though this cheese is soooo easy to make, I told her I would post a tutorial.

There are quite a few recipes for Chevre, the easiest one is to buy a packet of Chevre starter from New England Cheesemaking Supply. Be sure to check out the recipe tab on that page! Yum! This is the easiest method because the prep time is as long as it takes you to heat the milk to 86 degrees and add a packet of starter. This is absolutely the recipe to use if you cannot have cow milk.

New England Cheesemaking sells the Chevre starter packages of 5.

Fias Co Farm has a Chevre recipe here.

Fankhauser's Cheese Page has a recipe using ingredients you can buy from the grocery store here.

I use a recipe that I modified from Goat Cheese Plus (a yahoo group).

Ingredients:
1 gallon goat milk
1/4 cup buttermilk
1/2 teaspoon rennet disolved in 1/4 cup unchlorinated (or distilled) water.

Directions:

Heat 1-gallon of goat milk to 86 degrees.

Add 1/4 cup buttermilk. Let rest for 30-60 minutes. 30 minutes is minimum, but if it goes longer that's okay.

1/4 teaspoon rennet dissolved in 1/4 cup cool, unchlorinated (or distilled) water.

Pour the dissolved rennet through a spoon with holes so the rennet doesn't get poured all into one spot. Doing it this way spreads out the rennet and starts the mixing process. 

Mix with an up and down motion for 1-minute to thoroughly mix rennet into the milk. 

Cover and let the milk set for 10-12 hours (overnight or all day). If your house is cool (under 72 degrees) cover the pot with a towel or put it in the oven. You can also put it in a Wonder Box.
After 10-12 hours the milk should be set. It will be thick like yogurt, but may not give a clean break. Gently pour or scoop the curds into cheesecloth, a cheese bag, Chevre cups, or plastic cups with holes.

Sometimes you can see the whey separating from the curds, like this time. But sometimes it looks just like yogurt. 
You can hang the curds in  cheesecloth, a cheese bag, put the curds in special chevre cups, or in plastic cups that have holes punched in the sides and bottoms. Punch the holes from the inside of the cup to the outside so that there aren't any little 'pokies' sticking into the cheese.

Traditional Chevre is a shaped cheese, Farmer's cheese is hung in a bag (also called 'Bag Cheese').

Here are the Chevre cups I bought from New England Cheesemaking supply. I use the canning funnel that my friend gave me so that when I scoop out the curds they slide easily into the cups without shleping over the cup rims.

The whey will drain out the small holes. It will take about 10-12 hours (overnight or all day) to drain enough for the cheese to be ready.

You can also drain the curds in a cheese bag or butter muslin (which is much better than cheesecloth). I use the arm from my cheese press to hold the bag. You can hang the bag from a kitchen cabinet knob. Don't be surprised if the house cat or dog decides that the drained whey is sitting in the bowl just for them!

If I drain it from the kitchen cabinet, this is what it looks like.
12 hours later, this is how much whey has drained from the cheese.

This is what it looks like when it comes out of the cups.
My favorite recipe is really the New England Cheesemaking Chevre starter. I like the flavor a bit better than the buttermilk recipe, but if I don't have any commercial starter, I use buttermilk. You can also use less rennet if you want to since this is really an acid ripened cheese, not a rennet cheese. (Instead of using  1/2 teaspoon of rennet you can add 2 drops of rennet to 1/4 cup uncholorinated water.)

We don't eat our Chevre plain very often, we usually add basil, onion granules, garlic granules, and salt to taste. (look here.) Here's a link to another post that has a list of different flavors you can add to chevre.

This Thanksgiving we will serve it with pepper jelly on top! Yum!

Update 10/5/11:
The name of the great canning funnel that my friend gave me is Bottle Mate Canning Funnel. You can google it and/or find it here.

Thursday, September 22, 2011

Bottling Chicken

Yesterday I bottled chicken. I still have lots and lots to bottle. One of the local grocery stores had a great price on it and I wanted to stock up on pre-cooked chicken.

Canning meat is one of the easiest things to do, as long as you have a pressure cooker.

Here are the instructions from the Ball Blue Book

Raw pack chicken:
Pack meat into hot jars leaving 1" headspace.
If you wash the jars in the dishwasher and then leave them in there until you are ready to process the chicken.

Ladle hot water or broth over meat, leaving 1" headspace. Remove air bubbles.

Place lids and rings on jars.

Process pints for 1 hour 15 minutes (I process for 1 hour 25 minutes because of our altitude).

1 pound of chicken fits in a pint jar
That's it! Pretty simple.

Then I always have cooked chicken on hand for chicken enchiladas, chicken soup, or any recipe I might need shredded chicken for.

Here's a link for 40 different recipes using shredded chicken (I haven't tried them all--but they look delicious!)

Sunday, September 11, 2011

Pepper Jelly

Instead of making cheese with the new Cheese Maker, we did a bunch of other things getting ready for winter... including making pepper jelly.

Our garden has never produced so well! Not that it has been a spectacular producer this year, but our plant markers DID NOT turn into plant headstones this year! I didn't even kill the zucchini!

I can't remember a year when we ever got the pepper plants to grow, let along produce any peppers. The ones that we are getting this year a beautiful! I'll be dehydrating some, too, since we are getting so many.

Pepper Jelly is a tradition for us at Thanksgiving. One year I didn't have any left in storage and I had to go to the store to BUY peppers to make it!

Yay for Pepper Jelly!
This stuff is so easy to make! We love it over cream cheese and served with crackers.

I've also heard that it makes a wonderful glaze on barbecued fish or ribs. That is on our list of things to try.

Pepper Jelly

  • 2 1/2 cups finely chopped red bell peppers
  • 1 1/4 cups finely chopped green bell peppers
  • 1/4 cup chopped jalapeno peppers
  • 1 cup apple cider vinegar
  • 1 (1.75 ounce) package of powdered pectin
  • 5 cups white sugar

Sterilize six 8-ounce canning jars with lids. (This year I used Tattler re-usable canning lids found here, I bought mine from the local feed store. I'll post if I have any trouble with them.)

Place red bell peppers, green bell peppers, and jalapeno peppers in a large saucepan over hight heat. Mix in vinegar and fruit pectin. Stir constantly and bring to a full rolling boil. Quickly stir in sugar. Return to full rolling boil, and boil exactly 4 minutes, stirring constantly.

Remove from heat and skim foam.

Quickly ladle jelly into sterile jars, filling to within 1/2 inch of the tops. Cover with the lids and screw on bands.

Place jars in rack and slowly lower jars into canner. The water should cover the jars completely and should be hot but not boiling.

Bring water to a boil and process for 15 minutes.

We process 10 minutes longer than at sea level because we are about 5,000 feet above sea level and water boils at a lower temperature here.

You can find a good altitude adjustment chart here at Food.com.

Sunday, April 3, 2011

Queso Fresco

I decided to try making some Queso Fresco because it looked like an easy cheese and I wanted to try out the new press and mold.

It is easy, and delicious!

2 gallons of milk ready to go in the pot. I love our new milk bottles! They are much easier to handle than 1/2 gallon canning jars.
This is the milk straight out of the milk fridge. If we keep our milk in sealed jars and at a low temperature, the raw goat's milk still tastes fresh on day 10!
Heat the milk to 90˚F. No, I didn't pasteurize it. I used raw milk and just heated it up.
I added 4 cubes of mesophilic starter that I had prepared and frozen from a mother culture. You can also add 1 packet of direct set starter if you don't have prepared starter. I haven't tried it with buttermilk or yogurt, but that might work, too. I'll save that experiment for when we are getting 5 gallons of milk a day.

Mix in the starter well (or stir gently until the frozen starter is melted.) I had to turn the heat on very low after adding the frozen starter to keep the temp around 90˚F.

Next add 1/4 teaspoon of liquid rennet that has been diluted in 1/4 cup of filtered, unchlorinated water. Stir gently with an up and down motion for about 1 minute until the rennet is completely mixed into the milk and starter.

Now go clean a bathroom (or whatever takes 30-45 minutes) until the milk sets up and you get a clean break. I let mine sit for an hour because I got distracted. It was fine!

Cut the curd into 1/4" pieces. I try really hard to get my curd that small, but it isn't a consistent size no matter what I do. I do the best I can and while I am stirring the curd, I break any that look too big into smaller chunks.

Stir the curd gently for 20 minutes slowly raising the temperature of the curds to 95˚F. This is the hardest part on an electric stove. Use the lowest setting and if there isn't a change in the temperature within 3 minutes, turn the heat up slightly. The reason you heat slowly is to release the whey from the curds, but it has to be slowly or the curd forms a 'rind' on the outside and doesn't let the whey out.
Turn off the heat and let the curds sit for 5 minutes.

Drain off the whey. I put the bowl on the floor (and sometimes a towel under the bowl) because it is easier to strain the whey off. I'm not quite tall enough to do this as gracefully in the sink. I use a spatter shield on the front of the pot to hold the curds in and let the whey out.
 The whey doesn't all come out on the first pouring. I have to sit the pot on the floor and stir the curds gently and repeat the pouring/stirring process a few times until the whey is drained. Sometimes I will pour the whey off, then sit a strainer in the top of a pot and gently pour the curds into the strainer. Then I can let the curds sit there for a bit while they drain.

Pour the curds back into the pot if you used a strainer and add about 2 Tablespoons of cheese salt (salt with no iodine). Let the curds and salt sit there at 95˚F for 30 minutes. I put my curds in my oven with the light on. You could also use a Wonderbox, or wrap the pot in towels to keep it warm.

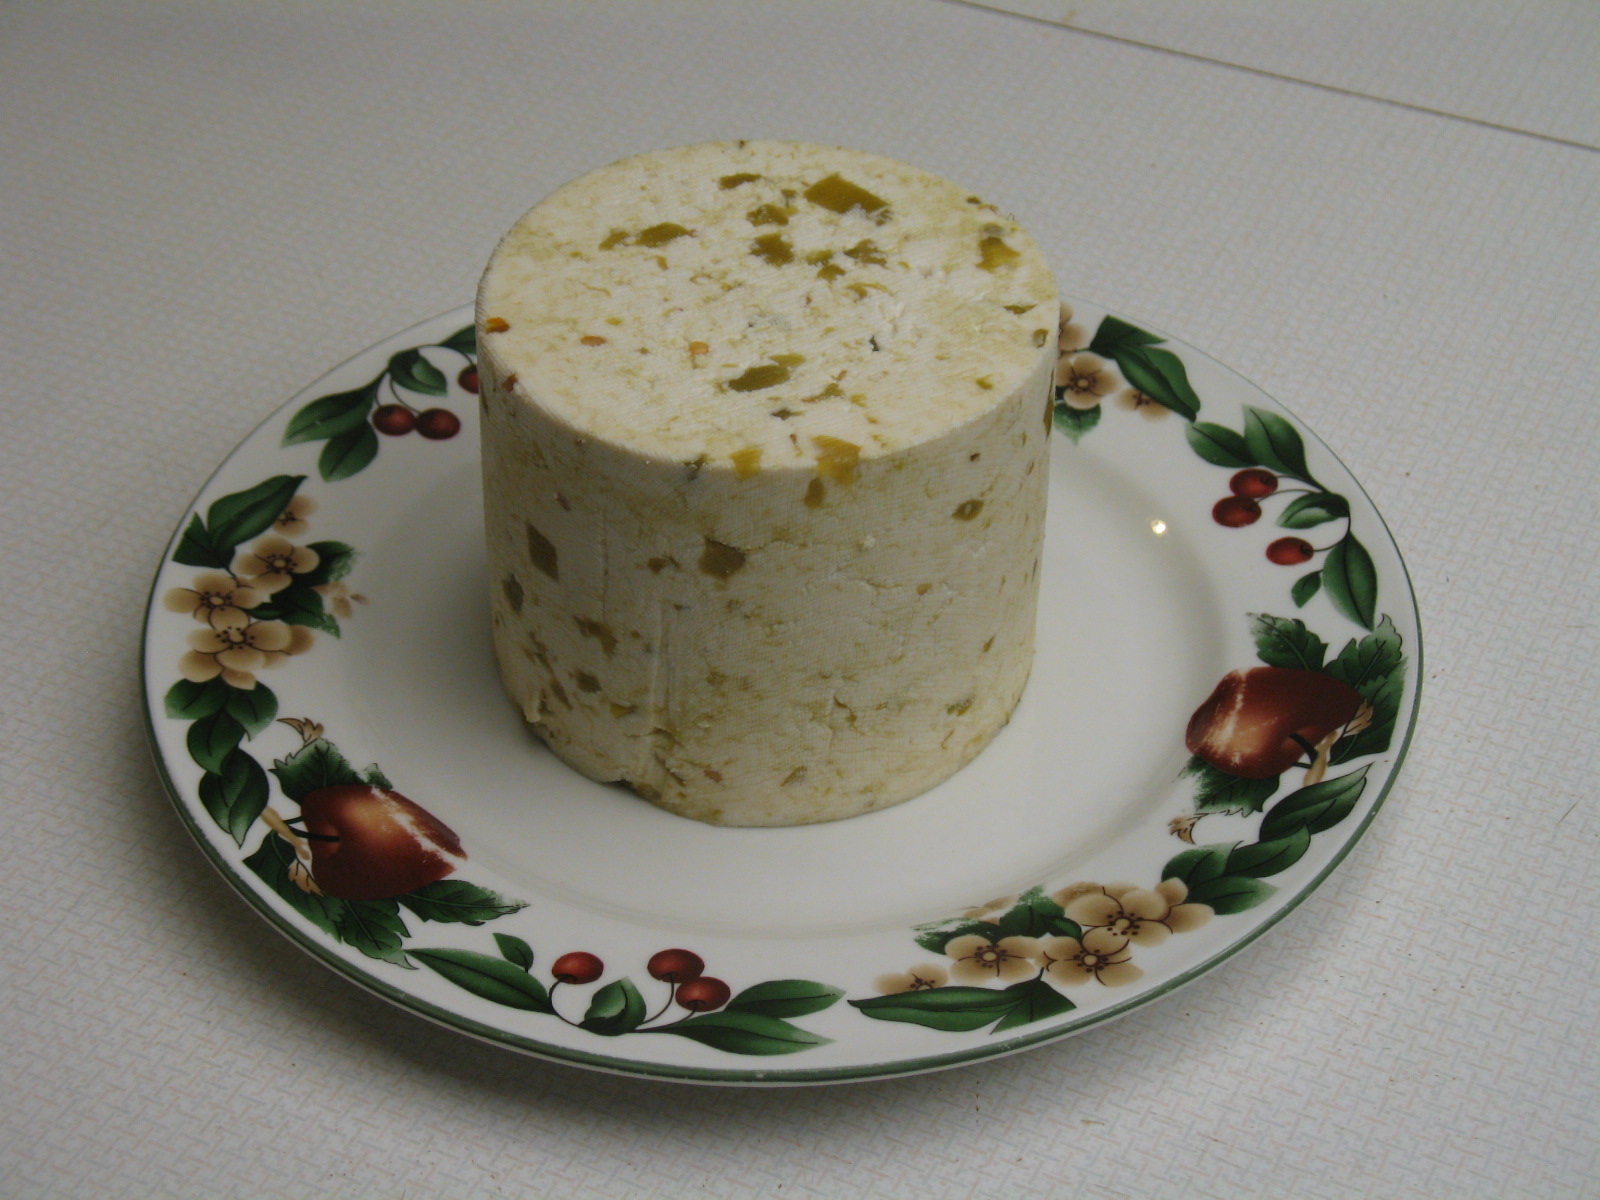
After 30 minutes gently mix in anything you think would be tasty. Our first batch had 2 cans of diced green chilies in it. Our next batch was mixed with basil, garlic, and onion. I think it would have tasted wonderful in some lasagna or crumbled on top of spaghetti--but it didn't last that long.

Next line a mold with cheesecloth and fill it with the curds. This was the first time I used cheese cloth instead of buttermuslin to line the mold. The cheese cloth works much better! It is a lighter weight weave than the buttermuslin and is much easier to handle when putting the cheese into the mold. The follower fits in better, too, because there is less bulk.

Press at 35 pounds of pressure for 6 hours. I let our second batch go for 10 hours because I wasn't really paying attention when I started the cheese and what time I put it into the mold. It turned out fine.

This is the first cheese we made in the new press with the new mold and the new drain. I LOVE them! It makes the process so much nicer than my old game board press!

Remove the cheese from the mold and taste it! Yummy!

I wrapped some up for a few good friends to try. They all loved it! One said I should add pimentos, too. I told him I would show him how to make the cheese and he could add anything he liked!
You can store this fresh, pressed cheese in the fridge for up to 2 weeks, at least that is what we read. Ours never lasts that long!