Enjoy the tid-bits of our everyday life: dairy goats, sheep, poultry, beekeeping, gardening, cheese making, spinning and knitting, quilting, and soap making. We're not experts, but we are willing to give almost anything a try! We're learning something new everyday--drop by once in a while and see what we've learned today!
Showing posts with label quilting. Show all posts
Monday, November 12, 2012
Quilt Back Done
This is the back of Blondie's first quilt. There were some mis-cut pieces and lots of scraps. This is what we came up with so we didn't have to spend $100 on backing material.
You can see the front here.
It's at the quilters.
It should be done before Thanksgiving.
We're pretty excited to see it so close to completed!
Saturday, November 3, 2012
Oregon Trail Quilt Back, Done!
The back of my quilt is finally pieced! It is now at the quilter's and will probably be done before Thanksgiving.
I'm happy to have one project so much closer to being completed!
You can see the front of the quilt here.
Yay for less yard work!
I'm happy to have one project so much closer to being completed!
You can see the front of the quilt here.
Yay for less yard work!
Wednesday, July 25, 2012
Blocks from Japan Quilt Top ~ DONE!
Blondie finished her quilt top today!
Here's the post with the original blocks.
Blondie sewed half the blocks. She cut all the setting pieces (small blue borders and white triangles) herself. I did the math so that all she had to do was cut and sew.
This is the first quilt she's done pretty much by herself. Meaning that she was pushing the foot pedal for the sewing machine....
She's so proud of it!
And I'm sooooo proud of her for taking on a new project, learning a new skill, and not giving up when it seemed overwhelming and really difficult.
I've got three more tops in the sewing room to finish..... I doubt I'll finish them this summer like I wanted to, but that's okay because I've gotten so many good things done this summer that I wouldn't trade them for finished quilt tops!
![]() |
| This photo was taken before the dark blue border was sewn around the edge. It was dark outside when she finished so we didn't take another photo. |
Here's the post with the original blocks.
Blondie sewed half the blocks. She cut all the setting pieces (small blue borders and white triangles) herself. I did the math so that all she had to do was cut and sew.
This is the first quilt she's done pretty much by herself. Meaning that she was pushing the foot pedal for the sewing machine....
She's so proud of it!
And I'm sooooo proud of her for taking on a new project, learning a new skill, and not giving up when it seemed overwhelming and really difficult.
I've got three more tops in the sewing room to finish..... I doubt I'll finish them this summer like I wanted to, but that's okay because I've gotten so many good things done this summer that I wouldn't trade them for finished quilt tops!
Sunday, July 22, 2012
Oregon Trail Quilt Top
I finally got my Oregon Trail Quilt top done! I kinda like it. I started it in September of 2009 at the wonderful Quilt, Etc. store. They have the best block of the month class ever!
I've got a few kids who think it would win the "Ugliest Quilt Contest".
Oh, well!
I still need to piece the back together. My plan is to use all the scraps from this quilt (all my 1860's reproduction fabrics) and piece them together for the back. That's gonna take some time, too!
My goal of finishing the 4 quilt tops I have blocks for is only 1/4 accomplished. It's been a busy summer here helping other people with their projects so I'm not upset about not getting everything done that I planned.
Important people are being taken care of and helped.
And that's what is most important in life.
I've got a few kids who think it would win the "Ugliest Quilt Contest".
Oh, well!
I still need to piece the back together. My plan is to use all the scraps from this quilt (all my 1860's reproduction fabrics) and piece them together for the back. That's gonna take some time, too!
My goal of finishing the 4 quilt tops I have blocks for is only 1/4 accomplished. It's been a busy summer here helping other people with their projects so I'm not upset about not getting everything done that I planned.
Important people are being taken care of and helped.
And that's what is most important in life.
Monday, July 16, 2012
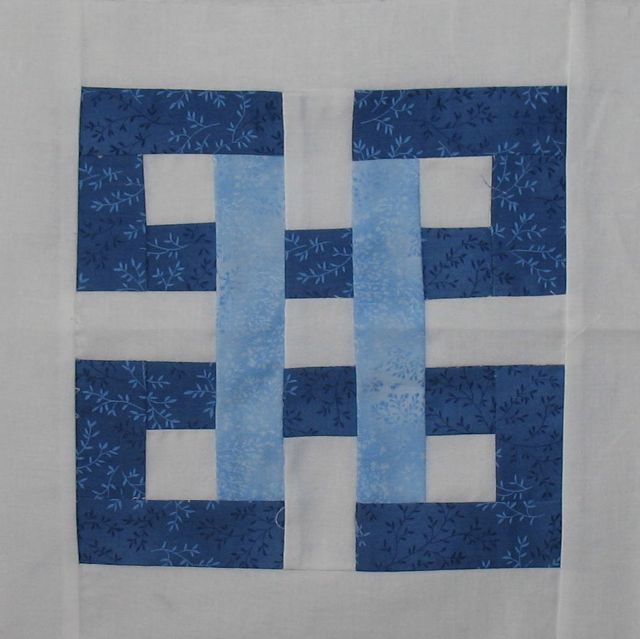
Blocks from Japan
Blondie and I have been working on a quilt for her over the last year. We've been participating in the country's best Block of the Month class. As long as we get the block assignment done before the next class, the next kit is free. If we don't have our assignment done, we've got to pay $5.50, which really isn't much at all!
The theme for this year's class was "9-inch Blocks from Japan". Most of these are from the class, but there are a few that we've added that seem to fit the theme. We have a few extra because the layout that Blondie decided on needed more blocks, 41 total to be exact.
The 'deal' was that I would make a block and she would make a block, then all the blocks would go into her quilt. Since she needed 41 we needed at least 20 different blocks for the pairs.
After going through three or four layout decisions, Blondie has decided on the final layout and her project for the next two weeks is to sew the blocks into the finished top.
Here are the photos of the blocks. I'll post a photo of the top when she gets it all put together. She's got something special planned for the back, too!
The theme for this year's class was "9-inch Blocks from Japan". Most of these are from the class, but there are a few that we've added that seem to fit the theme. We have a few extra because the layout that Blondie decided on needed more blocks, 41 total to be exact.
The 'deal' was that I would make a block and she would make a block, then all the blocks would go into her quilt. Since she needed 41 we needed at least 20 different blocks for the pairs.
After going through three or four layout decisions, Blondie has decided on the final layout and her project for the next two weeks is to sew the blocks into the finished top.
Here are the photos of the blocks. I'll post a photo of the top when she gets it all put together. She's got something special planned for the back, too!
Thursday, March 8, 2012
Stars in the Night Sky Quilt: Done!
This is the year I am trying to finish projects and not start too many.
It's working, sort of.
Son1's quilt is done, but we started remodeling the kitchen, which isn't done. Neither is Prion's bedroom.
But if feels great to finish something, so I'm motivated to keep going on the other quilts and remodeling projects that are already underway.
Now if only the contractor would show up to start some of the electrical work that he said he would do on Tuesday.......
It's working, sort of.
Son1's quilt is done, but we started remodeling the kitchen, which isn't done. Neither is Prion's bedroom.
But if feels great to finish something, so I'm motivated to keep going on the other quilts and remodeling projects that are already underway.
| Quilt top (of course Stinky claimed it first!) |
| Quilt back. |
Sunday, October 2, 2011
Quilt Top Done! Oh, My Stars!
Son1's quilt top is finally done! I only plan on finishing one quilt a year.
I actually have enough blocks from other projects to finish 3 more quilt tops, but I don't have anyone in mind for them, so of course there is no deadline to finish any of them!
Son1 wanted a new quilt since his old one is shredded--literally!
He wanted a bright quilt with stars on a black background. He had another pattern picked out, but the Block of the Month class that I attend started this one a few weeks after we had the fabric and pattern picked out for the other one.
That means I still have black background fabrics and batik fabric for another quilt top. I'm not sure if I like that idea or not!
I had the top almost finished two weeks ago, but then decided I HATED one of the stars, so I made another block and took the first one out. I'm much happier with the newer block, even though it was extra work to replace it.
This was the ONE thing I wanted to get done this weekend... and I DID! I love it when I can accomplish something on my list.
I still have to put the back together, and then take it to the lady who does the quilting, and then put the binding on it. But at least the biggest part of the project is DONE!
I actually have enough blocks from other projects to finish 3 more quilt tops, but I don't have anyone in mind for them, so of course there is no deadline to finish any of them!
Son1 wanted a new quilt since his old one is shredded--literally!
He wanted a bright quilt with stars on a black background. He had another pattern picked out, but the Block of the Month class that I attend started this one a few weeks after we had the fabric and pattern picked out for the other one.
That means I still have black background fabrics and batik fabric for another quilt top. I'm not sure if I like that idea or not!
I had the top almost finished two weeks ago, but then decided I HATED one of the stars, so I made another block and took the first one out. I'm much happier with the newer block, even though it was extra work to replace it.
This was the ONE thing I wanted to get done this weekend... and I DID! I love it when I can accomplish something on my list.
I still have to put the back together, and then take it to the lady who does the quilting, and then put the binding on it. But at least the biggest part of the project is DONE!
Labels:
quilting
Friday, January 28, 2011
Quilting
Photos of the quilt squares for the new quilt I am working on.
So that's one of my winter projects! Not done yet, and probably won't be done by kidding season. I try to finish one quilt a year. Last year's quilt is still all in blocks and not sewn into a top yet. Sigh.... that is sometimes the way it is with quilting.
![]() |
| Here is the basic layout for the quilt when it gets done. The stars in the photo are just place holders, each star in the finished quilt will be a different star. |
| LeMoyne Star--paper pieced. |
| This one will look better in the quilt because it will be on point, set into the quilt like a diamond, instead of a square as the photo shows. |
| This one took alot of work! I think this single block took about 2 1/2 hours to sew! The ladies at the quilt store call it "Christmas Star". |
| I changed this one just a bit from the original design. The center black square is supposed to be bigger, but I decided to make the black part smaller by putting a red boarder on it. |
Thursday, October 28, 2010
Oregon Trail Quilt: Extra Blocks
I generally like bigger quilts. If a quilt doesn't turn out queen-sized, then I add blocks or change the setting so I end up with a big quilt. It seems to me after all that work I should have something I can use, not hang on the wall!
The following blocks are the blocks I added to my quilt. The next step is to sew everything together and take it to the quilter to quilt. As much as I like a hand quilted quilt, they have to be treated so carefully that I don't finish my quilts like that. If they are machine quilted I can wash them in my front loading washing machine, and we can use them on the beds!
I went through the patterns from a few years ago when we also made 6" blocks and chose some that I thought would fit in an Oregon Trail quilt. I also found a few blocks on the internet to add.
All these blocks look like lots of work, just remember that it took me a year to sew all the blocks in my Oregon Trail quilt. I still haven't put all the blocks together. It just took me a long time to get all the photos and then post everything. Most months I only made the four blocks required for the class. There were a few months when I made a second set of four blocks so that my quilt would be bigger.
North Wind is another block that I paper pieced. Here is the pattern I drafted. The directions above show a much easier way to make the block, but I really wanted to have the corner triangles solid, and the only way to do that accurately is to paper piece the pattern.
I rough cut the pieces for North Wind before I paper pieced it. It makes for a much more accurate and faster block than the cut-as-you-go method that I've used before.
That's all the blocks, except for the filler blocks that will go between the pattern blocks. As soon as I get my other projects to a point where I can sit and sew, I'll sew up the top and post a photo of that, too.
The following blocks are the blocks I added to my quilt. The next step is to sew everything together and take it to the quilter to quilt. As much as I like a hand quilted quilt, they have to be treated so carefully that I don't finish my quilts like that. If they are machine quilted I can wash them in my front loading washing machine, and we can use them on the beds!
I went through the patterns from a few years ago when we also made 6" blocks and chose some that I thought would fit in an Oregon Trail quilt. I also found a few blocks on the internet to add.
All these blocks look like lots of work, just remember that it took me a year to sew all the blocks in my Oregon Trail quilt. I still haven't put all the blocks together. It just took me a long time to get all the photos and then post everything. Most months I only made the four blocks required for the class. There were a few months when I made a second set of four blocks so that my quilt would be bigger.
| Tumbling Leaves. This is a directional block, it looks a little different depending on how you set them into the quilt. |
![]() |
| You should be able to click on the image above and then right-click and save as to your computer. |
| Monkey Wrench. |
![]() |
| You should be able to click on the image above and then right-click and save as to your computer. |
| Sawtooth Star |
![]() |
| You should be able to click on the image above and then right-click and save as to your computer. |
| Joshua's Ladder, another directional block. I haven't decided how I am going to put this one together yet, but it will probably be this way. |
![]() |
| You should be able to click on the image above and then right-click and save as to your computer. |
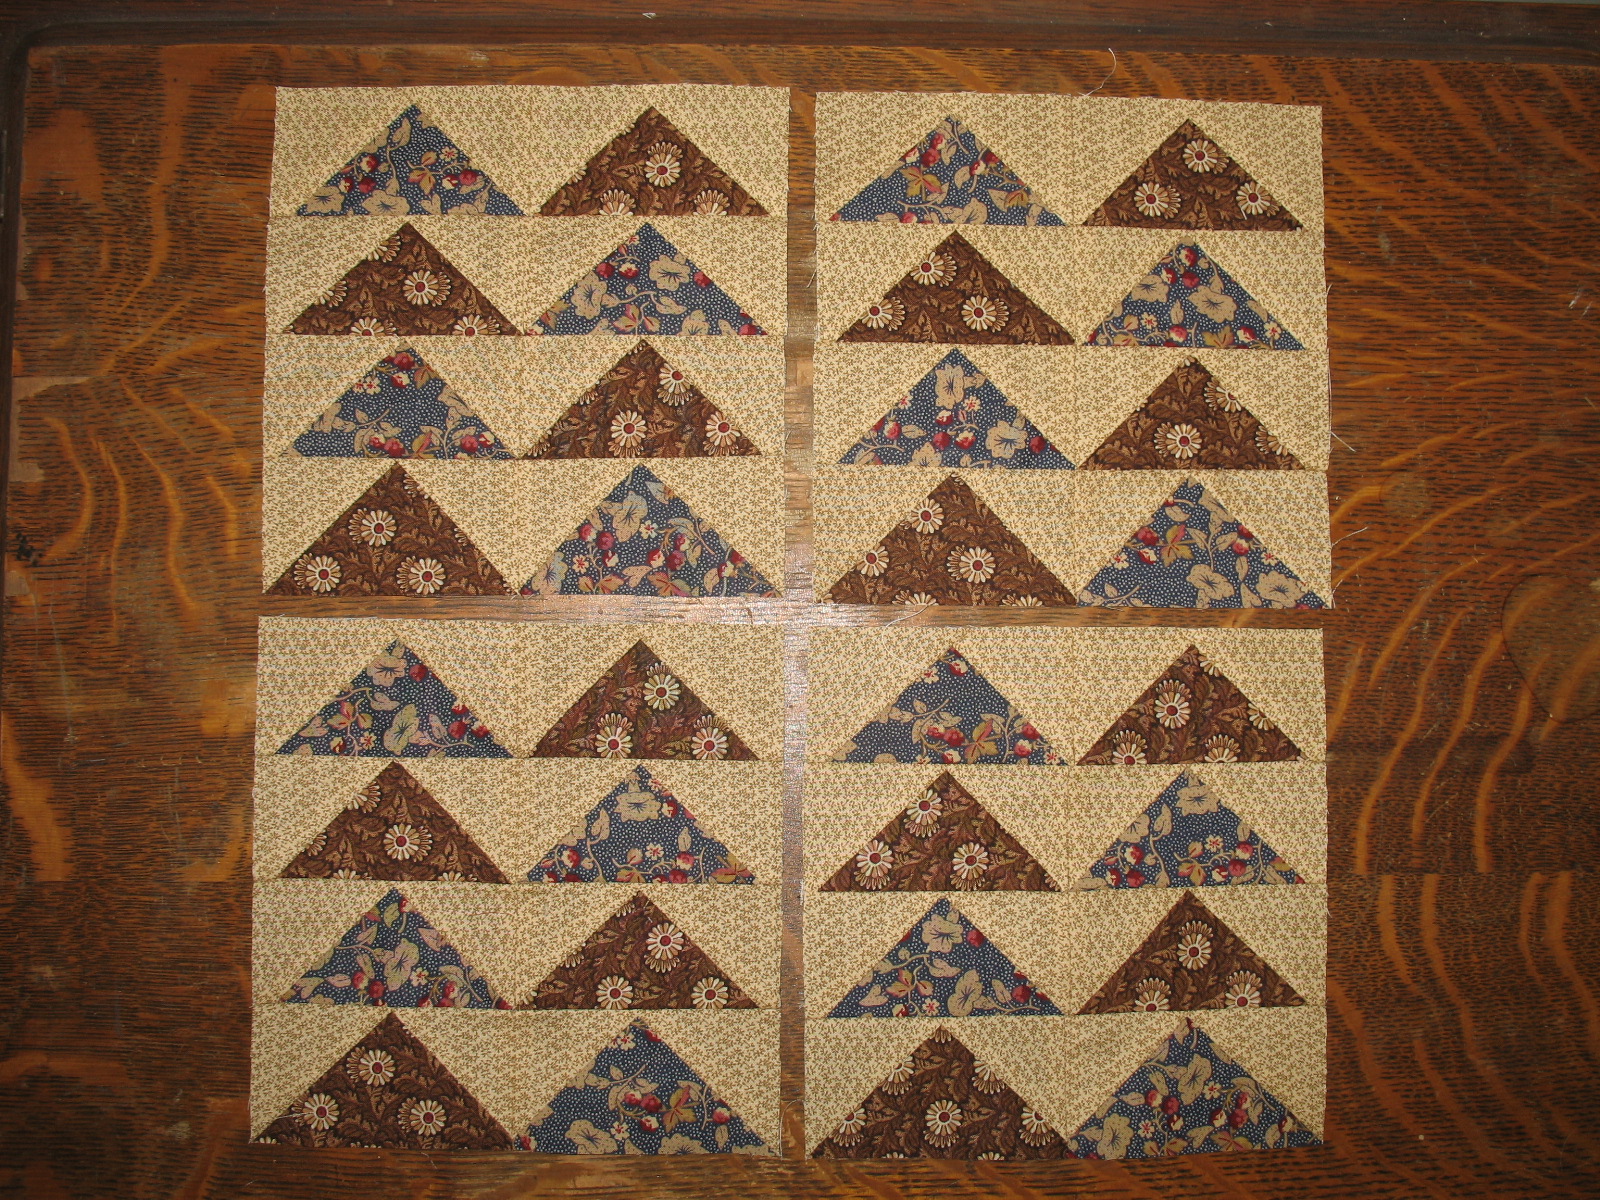
| Flying Geese |
![]() |
| You should be able to click on the image above and then right-click and save as to your computer. |
| North Wind, another directional block, sort of. I can't really imagine it being put together any other way. |
![]() |
| You should be able to click on the image above and then right-click and save as to your computer. |
![]() |
| You should be able to click on the image above and then right-click and save as to your computer. |
That's all the blocks, except for the filler blocks that will go between the pattern blocks. As soon as I get my other projects to a point where I can sit and sew, I'll sew up the top and post a photo of that, too.
Wednesday, October 27, 2010
Oregon Trail Quilt: Log Cabin
At the end of the journey, it would be time to build a log cabin, so that's the last block the quilt store gave us to do. I like paper piecing, and I like the center square of the log cabin to be the same size as the other strips, so I drafted a paper piecing pattern instead of using their directions.
I rough cut the pieces for my log cabin and then paper pieced them. I don't cut as I go, I cut all the pieces at once, just like I do for a regular pieced block. It saves me time and frustration cutting them to a little larger than the piece in the block. Paper piecing gives very accurate blocks! I love it!
| Photo of finished blocks. This is the way I will put it into the final quilt. Since this is a directional block, it will look differently depending on how it is placed. |
![]() |
| You should be able to click on the image above and then right-click and save as to your computer. |
![]() |
| You should be able to click on the image above and then right-click and save as to your computer. |
Tuesday, October 26, 2010
Oregon Trail Quilt: Prairie Queen
Prairie Queen took some time to stitch together. I strip pieced the small 4-patches used on the center sides of the block. That made it go faster than stitching together so many 1 1/2" squares! I also used a special ruler called a Triangle Square Up Ruler by Quilt in a Day. It made the corner half-square triangles very quick to piece.
This is a fairly old block. A Prairie Queen is a woman who lived, worked, and raised a family on the prairie.
You can find directions for Prairie Queen at Patterns From History.
Here is some fun information on Prairie Queens found at Prairie Queens.com.
You, or your female ancestor, might be a Prairie Queen if:
This is a fairly old block. A Prairie Queen is a woman who lived, worked, and raised a family on the prairie.
| Photo of finished Prairie Queen block. |
![]() |
| You should be able to click on the image above and then right-click and save as to your computer. |
You can find directions for Prairie Queen at Patterns From History.
Here is some fun information on Prairie Queens found at Prairie Queens.com.
You, or your female ancestor, might be a Prairie Queen if:
- You had any of your children at home, alone, with no doctor or midwife, no medicine and no family member present.
- You learned how to knit, sew, crochet, embroider, quilt, tat AND needlepoint all before the age of 12.
- You have cooked beaver, raccoon, possum, ground hog, squirrels or whatever else was brought home.
- You made mincemeat for pie by starting with a whole hogs head
- You have recipes for souse, hogshead cheese, egg butter and green tomato pie.
- You make your own sauerkraut from scratch.
- You make a poultice to put on your child's snakebite.
- You have six or more children.
- Your cellar is filled with canned vegetables from your garden.
Subscribe to:
Posts (Atom)