Showing posts with label Remodel. Show all posts

Wednesday, April 4, 2012

So Far, So Good!

I should probably post some photos of the goat kids that were born 3 weeks ago. They are doing really well!

I will tomorrow.

The kitchen has kinda taken over.

Here is a view facing North--the new pantry and the fridge.

The pantry is really two wall units stacked on top of each other. We needed cabinets that weren't as deep as a 'normal' pantry because we needed to be able to get around the corner to the left of the pantry with furniture from time to time.

The old pantry, which was big, but I was always loosing food and canned goods towards the back. The shelves are 22" deep in this one. It's perfect for pots, pans, and dishes.

The step and the bar are completely gone as of today. I had to put the new island in the kitchen just to see how it would fit and look. It is a bit big...

So I pushed it against the railing, which works out just fine!
Hopefully tomorrow the installer is coming back to finish putting in the cabinets and measure for the counter top. Our Good Friend will be here, too. He's going to lengthen a pony wall by 12" to fit the counter top as well as fir out the kick on the cabinets so the trim will cover the old floor.

Every day or two we get a little closer to being done! Hoooooray!

Sunday, April 1, 2012

Washing Dishes Without a Kitchen Sink

I'm betting that it will be another 3 weeks before we have a kitchen sink.

Even using paper plates and plastic utensils I still need to wash dishes. Especially because it's milking season.


The toilet is to the right of the wash station, which is great because I can dump any gross water down the toilet without worrying that it will plug the drain in the tub or the bathroom sink.

I always add about a tablespoon of bleach to the wash water. It keeps the washcloth from stinking, and it makes me feel better about washing all the milking equipment by hand.

It's actually nice to be able to wash by an open window instead of the middle of the kitchen. I love hearing the birds in spring and breathing the fresh air.

Only three more weeks.... I hope....

Saturday, March 31, 2012

Kitchen Changes....

Since one of the cabinets was the wrong size for the kitchen and would have to be re-ordered and custom made, we were able to see the kitchen in a way that we never expected.

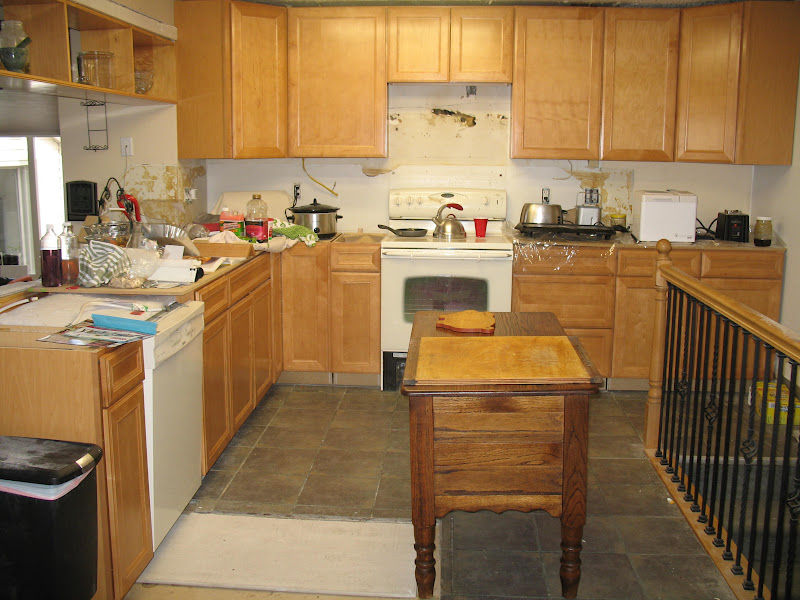
Here's a photo of the old cabinets. See the cabinet facing the chair? The new one that was to replace it was the wrong size. So the company would have had to order a new one and custom build it to fit.
This is how the installer left things on Thursday afternoon. Wow! This looks really open!
Hubby volunteered to take out the raised floor in this spot and replace the tile. Actually, he talked to Our Good Friend and he will be doing it this coming week.

I thought if the kitchen was this open then maybe I could find a small table to use as an island. I don't really need one, but I like the idea of one and I was looking for an old piece to contrast a little with the brand new cabinets.

This is what I found.
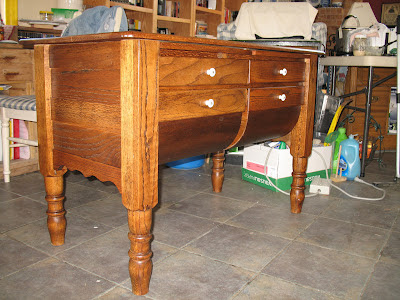
It's a reproduction, but in very nice shape and well built. No particle board! Hubby and I are thinking that we might seal the top with polyurethane because that would be more kitchen (water) friendly.

I found these cutting boards when I was waxing the piece. The guy I bought it from didn't know about them, either!

I love the rounded drawers! 
When I saw it, I had no idea how much it would cost. I was thinking that it was probably more than I would be able to afford.

But it was only $89 + tax! And the owner of the store helped me load it in the truck.

I bought it at Mona Lisa's in American Fork, UT.

All it needed was 30 minutes of love and Howard's Feed-N-Wax!

I LOVE it! It's a little shorter than the cabinets, which isn't great for all the tall guys that live here. But I'm not extremely tall, and one day I hope to see grandkids with flour and cookie cutters making cookies at the island.

Thursday, March 29, 2012

New Cabinets!

The cabinets are in... mostly.... sort of. Here's what happened in the last 2 days.
The counter tops finally come off Tuesday morning. Monday Vet2Be and Taco spent 3 hours working on taking cabinets apart and trying to get to the countertop from underneath.
Hubby came home from work early on Tuesday to help take out the counter top and the rest of the cabinets. He's been out of town for more than a week, and he gets to come home to this mess. Good thing he has a good attitude!

The original vinyl flooring under the cabinets. Really? Did anyone really ever like that flooring?
Yay! Cabinets are all out! A few of them had to come out in pieces. The kitchen had already been remodeled once with the existing cabinetry. Using them again, even in a garage, isn't an option.
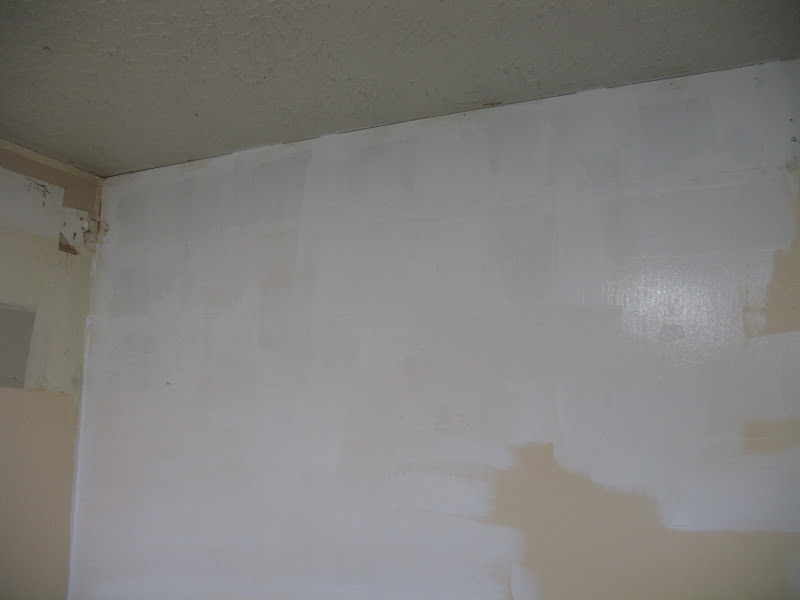
This is what the wall looked like where I had to take off original wall paper. The builder (back in 1978 or so) decided it wasn't necessary to prime the walls before putting up textured wall paper.
Can I just say I LOVE vinyl wall patch!? That stuff is awesome! First I primed the wall twice to seal the cardboard. I used Zissner 1•2•3 Primer. Love that stuff, too. Then I patched the ripped drywall with Ace brand Vinyl Patch. It dried in about an hour (better than 24 hours for the regular drywall patch) so I could sand and fix any spots I missed. This corner had to be done before the upper cabinet was installed.

Here's a little paint tray trick. I put the paint tray inside a garbage bag. We don't have a sink to clean up well, so using a garbage bag let me paint the wall, then dump the paint back into the can and throw away the bag. Vet2Be kindly volunteered to clean up the paint :)
Yucky brown paint! This was another project that got done on Wednesday. All 3 suspended seating posts were painted black using Rustoleum oil based paint.
Posts painted, wall  by the stairs painted where the cabinets will go. We're almost ready for the cabinets.
The other part of the kitchen on Wednesday night. Hubby's job was to lay cement board in all the spots where there was no tile on the floor. We knew that would make it easier for the installer.
This wall behind the fridge had wall paper boarder near the ceiling (you can see some of it on the left side of the photo). Wednesday night found me scraping it off with a single edge razor blade. Then using wall paper stripper to take the wall paper backing off.
There is stuff from the kitchen piled everywhere!
Yay! Thursday morning and the boxes are here!
Thursday night after the installer was as close to finished as he could get.
One of the cabinets was the wrong size. The narrow cabinet that looks 'lonely' and not installed in the photo will actually be on the left side of the bar facing in towards the center of the kitchen, not where it is now. The 24" cabinet that is supposed to be in the spot where the narrow cabinet is sitting, didn't fit properly. The doors wouldn't open, so the installer didn't finish.
This is what it looks like tonight.

And I'm actually thinking that I'd like to get rid of the "U" shaped kitchen and go with an "L" shaped kitchen.

Hubby thinks that is a great idea. Even if it means a bunch of work for him to remove the step and fill in the floor with tile. He volunteered... I told him if he was willing to do the work, I'd love it. I didn't want to add more work to his already busy schedule.

He thinks with Vet2Be and Son1's help they can do it this weekend.

I'll be calling the cabinet company tomorrow and asking them about updating the plans. It will actually cost them less money (because they won't have to re-order the cabinet) and less work because the installer won't have as much to install.

I'll post photos of the pantry tomorrow.

My hands are soooo tired tonight!

Monday, March 26, 2012

Progress on the Kitchen

Taco came by today. He's Vet2Be's best friend--well, one of two best friends!

They worked for about 3 hours and got a bunch of the cabinets unstuck as well as the dishwasher pulled out. You might not think that's very much work for 3 hours. But really, with this kitchen, it was a huge amount of progress.

One of the reasons for the new cabinets is that the sink has leaked (okay--more like flooded) so many times that the particle board underneath is soft all the time. Even when it's dry.

They worked for more than an hour trying to get the sink and faucet out. Apparently Hubby is a good installer--because the sink didn't budge.

Taco said whoever put the sink in didn't want it to leak.... ever.

That would be Hubby.

Hopefully when we get the sink cabinet out tomorrow we'll see that the floor underneath it is okay. I'm worried that we might have to replace the subfloor under the sink after all the flooding we've had the last 15 years we've lived here.

The sink and clean up has been moved to the downstairs bathroom. I set up the camp kitchen in the shower. Hopefully I won't have to use it for more than a few days.

Wednesday, February 1, 2012

Kitchen Demolition

The kitchen demolition started today. The cabinet guys wanted to come and do a final measurement on the cabinets, but the dropped ceiling had to be out before they measure.

So, the shed doors are put on hold while Our Good Friend worked on taking out the dropped ceiling.

We weren't really sure what was under there, but had an idea that it was put in after the house was built and not during original construction.

We were mostly right on that, you can see what I mean in the photos.

I love those plastic buckets! They stack and store and are easy to clean. I have all of my upper cupboards stored in five of them. (I'm not kidding!)

It took me about an hour to take everything in the upper cupboards out and everything off the walls and counters.
Everything is stored in buckets, on the kitchen table (under a sheet) and in Son1's room. Not much is in his room, though. The frame was around the light box in the dropped ceiling. I'm saving it for now, I'm not sure what I'll do with it, but I'll think of something!
I even remembered to cover the computer with a sheet!
Demolition begins! Out comes the dropped ceiling!
Just as we suspected, the dropped ceiling was added after the house was built so the original textured ceiling is still there! Yay!
Unfortunately, the original builders built in some soffits so the cabinets wouldn't have an open space above them. It saves on cleaning the upper cabinets, so I would have chosen to do the same.

The soffit is framed in with 2x4s and plywood. It took Our Good Friend longer to get the soffit out than it did to take out the rest of the dropped ceiling.
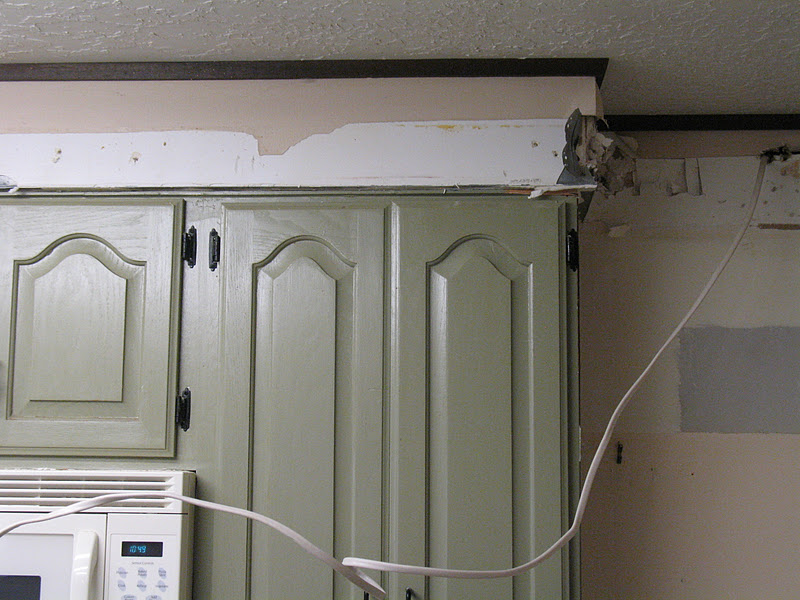
All the soffit is out! The insulation is from the attic, yup, the attic.
This part will have to be patched with new wall board. The wire hanging was from the old light that was above the sink. It's switched, and we will move the wiring so we can eventually install under cabinet lights.
Soffit area shoved full of insulation.

Before the house was remodeled (so the neighbors say) this was a door to the driveway. I love kitchen doors, but I'm not re-installing one here. I'd rather have the counter space!
Our Good Friend and Vet2Be put sheetrock up into the spots that the soffit left.
They had to cut holes for these wires to go through. The original electrician was a bit lazy and decided that since the soffit was there, he didn't have to drill holes to put the wires through, he could just lay them through the soffit. When Hubby saw that, he decided that we are getting an electrician to come in and re-wire this area so that the wires go where they are supposed to go, and the new cabinets can go to the ceiling.
The electrician will also take care of this wire. It went through the dropped ceiling and powers a light on the drive way. Whoever put in the dropped ceiling didn't want to run the wire through the attic......

They wanted to pull it out of the box in the ceiling and run it through the dropped ceiling--after all, who would want to pull out such a lovely dropped ceiling and make the kitchen feel BIGGER?!
This is what it looks like tonight. All the upper cabinets out (some will be re-used in Spunky's home that is being rented right now. I copied her color, so the cabinets are not the same style, but they are the same color!)
So far we haven't hit any huge problems. We weren't expecting to hire an electrician to re-wire, but that's okay. Every remodeling project takes 20% more time and 20% more budget than expected. It's the law of remodeling!

Saturday, January 28, 2012

Starting the Shed

Another project we are working on is getting a new shed built for the lawn mower, tiller, and all the other yard equipment. Hubby's got a great employee (and friend) who is helping us with both the kitchen and the shed.

Hubby's business is always slow in January and February which means this great friend's budget is a bit tight to take care of his amazing wife and six kids. That means that we have the chance to have some work done around here by someone who is really trustworthy and does a FANTASTIC job! He is also someone who doesn't mind having his kids (or mine) help them. He's a wonderful teacher, too.

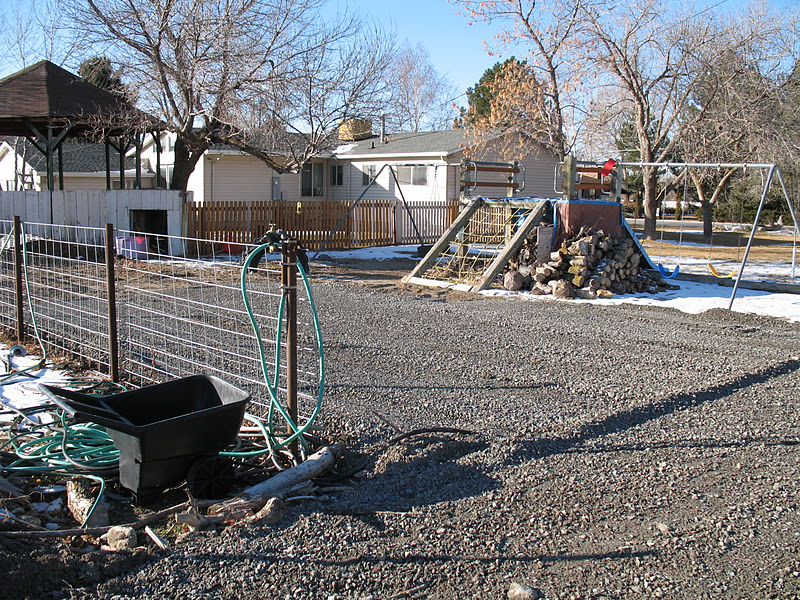
This is where the shed will be built. The three fruit trees haven't done well here (we think it's the soil) so they will come out.
Another photo of the same spot.... makes me realize we need to do something about the gazebo, too. But that is not as high on the priority list.
As long as our friend is bringing in road base to put under the new shed, he's going to fix this hole at the end of the Barn Road. It used to have a HUGE cement water conduit that would direct the water either onto our property or across the street.
Another view of the 'Big Hole' and wasted corner.
Starting to clear the area where the shed will be. It's about 8 inches lower than the Barn Road.
With all the snow gone, it looks like a big mess.


Starting to move the gravel around.
This is the Barn Road, the access road that goes from our street to the barn, which you can see on the right of the photo.
Done for the day! The camper is moved into the back corner, the street end of the Barn Road is graded with the extra road base....
And the pad is ready for the new shed!
I can't tell you how lovely it looks compared to what it used to look like! I'm just all smiles! If it stayed like this without a new shed, I'd be happy, too!
The camper is parked in the old water conduit spot. It's not quite as level because he used some of the fill dirt from the garden area before he put the gravel on top. No worries, we can take care of that with rocks and dirt this spring.
All ready to start building on Saturday!