Showing posts with label soap. Show all posts

Thursday, September 1, 2011

Custom Soap

One of my friends wanted some custom soap for her mother's 70th birthday party and asked if I would help.

Wow! I learned alot this time around! This is the first time I've made custom soap.

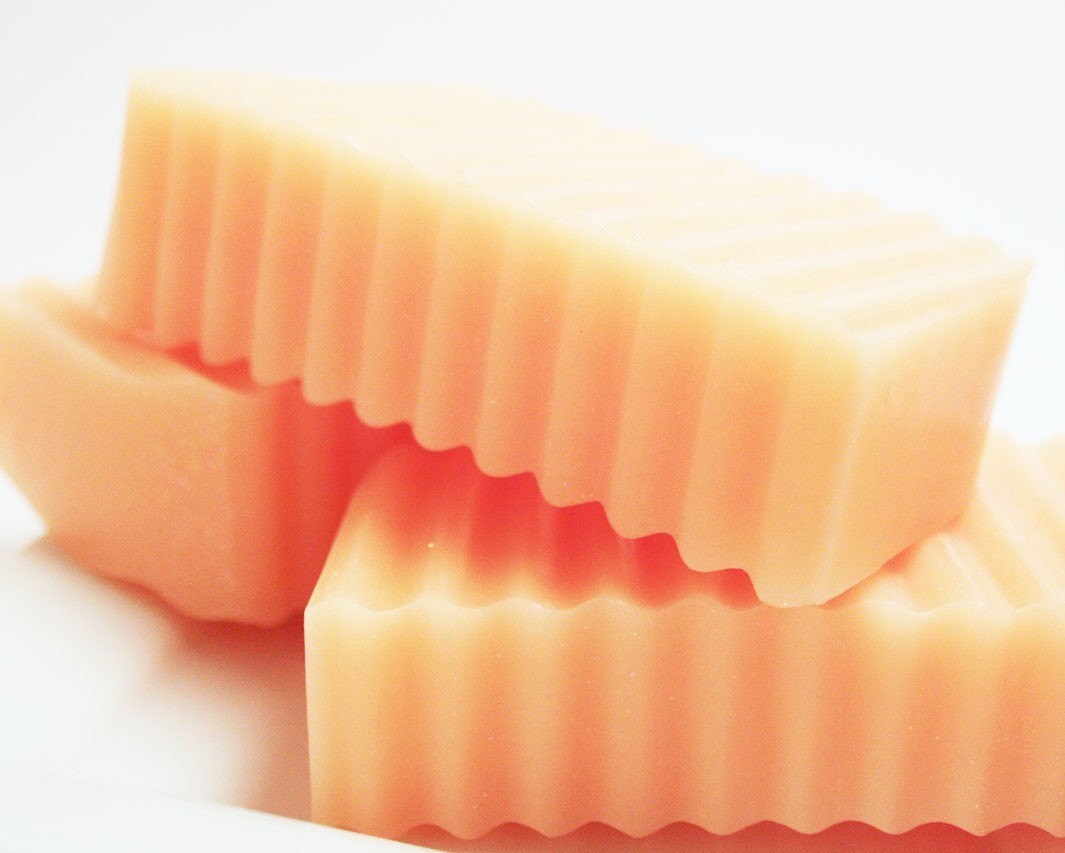
She wanted the soap to look like this:
Found Here
She wanted the color to be pinkish/rose like these candles:


She also wanted goat's milk soap, but it was impossible to get the color she wanted with goat's milk. The color was always brown.

This is the mold I wanted:
Found here at Soap Making Resource
but since I was only going to charge her for materials to make the soap I don't want to invest $32 in a mold.

Instead I made one out of card board, which worked out okay. Then Hubby found pencil boxes at Hobby Lobby that were better than the cardboard molds. They were only $4 each, so we have two. If you want to see what they look like, you can find them here. The brand is Really Useful Boxes and they are smooth on the inside and very strong. I lined mine with parchment paper so that the soap would slide out easily.

But the Really Useful Boxes don't have the really nifty miter cut so that I can cut the soap straight.

Instead I used the old cardboard soap mold end as a guide.
I made a mark about 1" past the end of the box and lined up the end of the soap with the mark. Then I kept the cutter lined up with the edge of the box so that the soap was even from top to bottom.
The mark 1" from the side of the mold is on the flap that lays on the counter. The 3" x 5" card at the bottom made it easy to slide the soap along the mold.
Soap that is almost exactly the same height!
Although the soap doesn't look uniform in color in this photo, after a few days the color has evened out and I think she will be very happy with the final product.

It took me about 12 pounds of 'practice soap' before I was able to get the right color. Sheesh! That's why I only do this for friends and I don't do it for a job.

I had to throw away 4 lbs of soap that I had used titanium dioxide in. For some reason the titanium dioxide didn't allow the lye to combine with the fats, so the soap would have been dangerous to use.

The dye I used was a powdered dye, which I have never used before. I mixed it with water and then used a syringe to get the same amount into each of the 4 batches of soap so the color would be as close as possible between all the batches.

The rest of the soap will be either used at home or given away. Most of it is unscented, which means that any of my kids will use it because they don't care what the color is (and there are ranges of color for tan to brown to bright orange!)

Thursday, December 3, 2009

Gift Soap

Prion lives in a dorm with five other girls. She loved her room mates last year, but these girls just aren't as interested in getting an education as she is, that translates into; "They only go to class when they feel like it." Prion is also a Sophomore this year, and the other girls are all freshmen.

Last year I knit each of her room mates a miniature stocking in their favorite color. They loved them and left them hanging on the wall all year. This year Prion didn't want me to spend as much time on the gifts for her room mates, so she asked if I would make them some goat's milk soap. It costs a bit more than the stockings, which I can make from scraps, but it is much faster. It takes me less than 30 minutes to make a batch of soap!

Here is the soap all ready to mail to the dorms. I decided not to wrap the soap in plastic so that it would have more time to dry and harden. I didn't have any real ribbon on hand, so I tore some fabric scraps to wrap around the soap. They make soap look festive and a bit rustic. If Prion wants to, she can tuck a piece of greenery under each 'ribbon'. 

Hand-crafted goat's milk soap is still a very nice present, and I was glad that I didn't have to spend time knitting them all stockings. I have completed five stockings already, with 17 more underway. I hope Prion's room mates like their gifts!


Saturday, October 10, 2009

Busy Week

Hubby has been gone since Monday and won't be back until Wednesday leaving Vet2Be and me to take care of things on the home front. We've been busy!

This morning we took a trip to the farm store to buy grain and feed for all the animals. Vet2Be also needed a new Sunday shirt and Sunday shoes before tomorrow since he has grown about 4" this year. Not only has he grown taller, he has grown stronger. Lifting 50 lb bags of grain is really easy for him now. He is really enjoying that!

This afternoon we filled the wood box with wood for the stove, as well as filling two plastic totes with kindling. Both are by the back door to make it easy to bring wood in to start a fire. We had some help from two young neighbor boys who love to be here with all the animals and they like the work, too. They did a great job! Not only did they fill the wood box themselves while I was filling the kindling boxes, they helped spread the pine needles in the poultry pen. Their mother said all her children think of our farm as Welcome (to our other) Home Farm, since they feel so at home here. I loved to visit my Aunt's farm when I was growing up and Hubby's grandparent's farm after we were married so I am glad other families feel the same way contentment when they visit here.

The last few years we have used pine needles in the poultry pen. They are stiff enough that they keep the pen dry or at least keep the chicken's and duck's feet out of the muck below. The year we used straw it was a mucky mess all winter and difficult to clean in the spring. Even though the pine needles are stiff, they don't seem to bother the duck's or chicken's feet, which was a concern the first year we used them. Our neighbors like to bring over their pine needles, too! It saves them the time of burning them or bringing them to the green-waste facility. In the spring the pine needles are ready to spread on the garden and till in. Our soil is alkaline here so the pine needles do a great job of adding some acid as well as loosening up the clay soil.

This week we also swept out the barn, cleaned buckets, and got some of our does bred to our buck. We're still milking every morning. And the new ducks have just started laying eggs!

We got a new driveway this week, too! Yipee! The old cement driveway was a gravel pit at the end and has needed to be replaced for about 4 years. It is nice to have an asphalt driveway that is smooooth!

We picked 3 1/2 trees worth of apples this week, too. Right now we have about 25 bushels of apples stored in the barn. We'll pick the rest of the fourth tree this coming week. Hopefully we will be able to make cider from either a rented or borrowed cider press. I wanted to have a press of our own this fall but with so much traveling back and forth to the East Coast this summer, a cider press is not in the budget.

We are hoping to have a small "Harvest Day" on our farm and sell whatever cider we don't have room to store. There are plenty of people who said they would love to see a cider press and how it works. We'll invite neighbors and friends over to watch us press the apples, sample the cider, and bring containers to fill. We've got other neighbors who are selling pumpkins this fall, and another neighbor who sells honey. We'll invite them to sell their goods that day, too. One of Vet2Be's friends wants to be a chef so he picked 2 bushels of apples and he will bring some apple treats to sell so he can also earn some money.

I made 2 batches of goat's milk and oatmeal soap on Monday. One was scented with Cranberry and the other was scented with Grapefruit. My neighbor heard what I had made and asked if I would teach the girls in our church's youth group how to make soap. So I taught another soap making class on Wednesday evening to some of the girls in our church's youth group. They loved it! The idea that goat's milk soap with oatmeal might help keep their skin clear was a big incentive to learn how to make it themselves. Apparently the local 'fancy' store sells goat's milk soap for $8 a bar. Each of the girls and their leaders went home with a small 1 1/2" by 2" bar of soap that smelled lovely. Their leader picked out a scent called Red Current that was light and refreshing. It filled the whole kitchen with a wonderful smell.

We had a great time on Friday evening! One of my other friends is knowledgeable about Navajo rugs, Navajo Churro sheep, and Navajo history. She came with her family and gave a wonderful presentation to 3 homeschool families. She and her husband did a fantastic job teaching us all sorts of interesting things about the Churro sheep and rug making. She has a beautiful collection of rugs and a Navajo loom that she showed us. Her son also demonstrated how to use a Navajo spindle. Hopefully I will get the pictures from one of the mothers that was there with a camera and post them sometime.

I haven't cleaned out the flower beds or the garden yet, but since I work part-time and we homeschool, it was a busy week getting everything done without Hubby's help. I'm glad that the leaves haven't fallen off the trees yet, too. I don't think I could have squeezed one more thing in this week!

I often look forward to the change in seasons because it means a different type of work. As we change from summer to winter, my work changes from gardening and outdoor farm work to more indoor work like knitting, sewing, and spinning. Today is one of the days that I am really looking forward to sitting in front of a warm fire and doing some hand work with the dogs sitting by my feet, Vet2Be reading in the chair next to me, and some pleasant music in the background.

Tuesday, September 15, 2009

Making Soap!

A few homeschool families that we know wanted to learn how to make cold-process soap (using lye and fats). Monday was the day! Lots of good kids and very nice adults. I wanted to 'blog' the class so that the people who were here could use it for a reference. I had a few great photographers who took pictures for us all to enjoy.


* * * * * *
Warning: This is how I make soap. Soapmaking can be dangerous because of the caustic nature of lye. I hope I scared the kids enough that they will not do this without adult supervision. I am not responsible for any injuries, losses, or other damage that may result from your use or misuse of the information I've provided.
* * * * * *

Here is the recipe we used:

You need a good recipe or a lye calculator to make sure you get the proportions right between the lye and the fats. Each fat has a different saponification value. If you want to experiment with different fats, you need to use a lye calculator to input the amounts and types of fats you will be using. The lye calculator tells you how much lye and water (or other liquid) you will need.

The lye calculator I used can be found at Benjamin Farms. Here is a link to their Soapmaking 101 page. Simple step by step directions that I used when I taught this group. Another lye calculator can be found at Pine Meadows. I buy my supplies from Pine Meadows because they are so helpful and their prices are reasonable.

Gather all your equipment first.
  • safety equipment (rubber gloves, apron, goggles)
  • wooden spoons dedicated to soapmaking
  • stainless steel pots to melt the fats in (never use aluminum or cast iron for making soap)
  • a thermometer
  • a scale that is accurate to 0.1 ounces (many kitchen scales are)
  • a stick blender (or an old blender container for your counter blender)
  • containers to measure the water, lye, and fat in (you must use a completely dry container to measure the lye in)
  • a glass (or other non-reactive bowl) for mixing the lye and the fat together
  • soap mold (a utensil organizer from Wal*Mart works very well for a single pound of soap)
  • a spray bottle with vinegar (to neutralize the lye if you spill some)
  • an old towel (for keeping the soap warm after it is mixed)
  • an old cooling rack or something to sit the soap on while it cures for a few weeks
The general rule is to have dedicated soapmaking equipment. In other words, don't use the equipment for anything other than making soap.

Now for the fun part!

Usually I mix the lye and the liquid first so that it can cool while I am melting the fats. There were enough people here that I didn't want to leave the lye too long and let some of it escape into the atmosphere. I also didn't want to leave the lye unattended outside. It is very dangerous stuff! So... we melted the fats first.
Beeswax has the highest melting point, so that went in the pot first. In the picture above you see one of the children measuring the Coconut Oil
.

Here is another helper measuring the Palm Oil.


One really cute helper wearing his goggles and waiting for his turn!


The fats beginning to melt in the pot.


All the fats melted and ready to be mixed with the lye.


We forgot to take pictures of mixing the lye with the water. I try to do it outside because the mixture tends to have fumes. The next best place to do it would be in a bathroom that has an exhaust fan. Remember to always add the lye to the water. NEVER add the water to the lye. If there is not enough water (if you pour water into the lye) you may end up with a small volcano which can cause injury! Mix the lye with the water until the lye dissolves using non-reactive spoon. I use a wooden spoon that is dedicated to soapmaking. Mixing lye and water causes a chemical reaction that produces heat.

Often the lye will be too warm to add to the fat (or the fat will be too warm to add to the lye). The kids were surprised at how hot the container was that held the lye/water mixture. They knew I had not used hot water from the sink!

The lye mixture was still too hot at 180˚F. I put the plastic container that had the hot lye/water mixture into a bowl that had ice and water. This cooled the lye/water mixture fairly quickly to about 110˚F. The idea is that the melted fats and the lye/water mixture are close to the same temperature--about 100˚F. The fat had already cooled down to about 115˚F.


Here are the melted fats and the lye/water mixture ready to mix together.


This is what the melted fats look like before I added the lye/water mixture.


I used a glass jar to hold the fats and then I poured the lye/water mixture into that jar. It is recommended that you add the lye mixture to the fats. I don't know if it really matters, I've done it both ways. I used a glass jar so the kids could see what was happening. You can use any type of non-reactive bowl. Usually something with straight sides will be safer than something with sloping sides. I liked the jar because it comes in at the top. If the mixture splashed at all (it didn't) then the chances of it splashing out of this container was less than out of a bowl.


The last soapmaking class I went to had us use a stick blender. When I first learned to make soap we used a regular stand mixer and it took anywhere from 30 minutes to an hour for the soap to 'trace'. The stick blender works in about 5 minutes! (However, when making goat's milk soap I have to use a regular blender because it does take longer to get to 'trace' and the stick blender was getting too hot.)


Here the mixture is tracing. I added the fragrance at this point. It is best to add the fragrance after the lye has started to combine with the fats. If you want to add a colorant, you can add it with the fragrance.

Here is a good video of when soap traces.


I think they are enjoying the chemistry/soapmaking lesson. And they are all wearing their goggles!

Okay! The mixture is ready for the mold!


My friend is an excellent photographer! I had no idea she was behind me taking photos! This is a great view of pouring the soap into the mold. You can see that the mold is really one of those drawer organizers. They hold a one pound batch of soap.


Another photo of putting the soap into the mold. I am still wearing gloves because the soap has not completely saponified yet, the lye and the fats have not finished combining so the mixture is still caustic.

After the soap is in the mold I tap it on the counter to remove as many bubbles as possible.


The next step is to cover the soap with a piece of plastic wrap and cover it with a few layers of towels to keep it warm until it is hard. The plastic wrap is right on top of the soap. It makes it easier to smooth the top of the soap and it helps keep the heat in and the air out until the soap is hard and completely saponified.


After the soap firms up (about 10 hours later) I turned the mold upside down and tapped it on the counter. If the soap hadn't come out easily, I would have put the mold with the soap into the freezer for 15-30 minutes. That helps shrink the soap and then it comes right out of the mold.

Vet2Be told me I should have taken a photo of the soap as it came out of the mold. He's right. Sorry I forgot! After the soap came out of the mold I cut it with a sharp knife. At this point the soap is firm, but still cuts easily. You can cut the bars into whatever size you want. I cut the soap into smaller bars so that I can give each family a few to finish curing at their house.

The soap is ready to use now but if you let it cure longer (let the water evaporate out of the bars) then the soap will last longer when you are using it. I've had different instructors and books give different time estimates for curing--anywhere from 2 weeks to 4 weeks.

You can let it cure in the linen closet and it will make your linen closet smell wonderful when you open the door! You can cure the soap any place that is in a fairly dry area and out of the sun.

If you want to learn about the history of soapmaking you can look here (an easy to understand explanation) or here (from Wikipedia--a more 'chemical' explanation).

Friday, July 3, 2009

More Cheese! And Some Soap!

We are taking care of a friend's farm while they are out of town for 10 days. They live about 25 minutes south of us. They are a great family and have taught Vet2Be alot about goats. The mom is Vet2Be's 4-H leader. They raise Nubians and we milk 3 each morning and evening. They also have some steer that they are raising for beef, chickens, and some horses.

Nubians can be very 'opinionated'. I guess you could also call them stubborn. Two of the ones that we milk can be a bit difficult on the stand. They are fast to milk, though, because they have larger orifaces than our goats do and they don't give quite as much milk.

The great thing about Nubian milk is the high butterfat content. Saanen milk doesn't make mozzarella because the butterfat content is about 2%, Nubian milk is about 4%, just like the whole milk in the store.

So today I made two batches of 30 Minute Mozzarella. Both batches were wonderful! They are in the fridge waiting for our 4th of July Picnic tomorrow. If you are interested in making mozzarella from goat milk, make sure you add extra citric acid. For some reason goat milk needs to be a bit more acidic to make good mozzarella.

I also decided to make some Feta. I haven't made any since last year but we have plenty of milk right now. Hopefully it will turn out tasty for tomorrow, too!

I also tried another batch of goat milk soap today. The first batch I made last week didn't turn out at all. I think the lye was too old. The batch I made earlier this week had some weird spots in it. They weren't lye, but I'm not sure what they were. I tried to remelt the batch and put it in different molds but this recipe does not melt well. I'm sure the soap will be fine to use, it just doesn't look pretty!

Today's batch looks nice so far. We'll see how it turns out when I take it out of the mold tomorrow. It is in the refrigerator for a few hours. When you use milk in a soap recipe it tends to super-heat and turn the soap into a gel. That really isn't a problem, but the heat tends to carmelize the milk and turn the soap a golden color instead of a lighter yellow color.