Enjoy the tid-bits of our everyday life: dairy goats, sheep, poultry, beekeeping, gardening, cheese making, spinning and knitting, quilting, and soap making. We're not experts, but we are willing to give almost anything a try! We're learning something new everyday--drop by once in a while and see what we've learned today!
Showing posts with label Oregon Trail Quilt. Show all posts
Showing posts with label Oregon Trail Quilt. Show all posts
I finally got my Oregon Trail Quilt top done! I kinda like it. I started it in September of 2009 at the wonderful Quilt, Etc. store. They have the best block of the month class ever!
I've got a few kids who think it would win the "Ugliest Quilt Contest".
Oh, well!
I still need to piece the back together. My plan is to use all the scraps from this quilt (all my 1860's reproduction fabrics) and piece them together for the back. That's gonna take some time, too!
My goal of finishing the 4 quilt tops I have blocks for is only 1/4 accomplished. It's been a busy summer here helping other people with their projects so I'm not upset about not getting everything done that I planned.
Important people are being taken care of and helped.
I generally like bigger quilts. If a quilt doesn't turn out queen-sized, then I add blocks or change the setting so I end up with a big quilt. It seems to me after all that work I should have something I can use, not hang on the wall!
The following blocks are the blocks I added to my quilt. The next step is to sew everything together and take it to the quilter to quilt. As much as I like a hand quilted quilt, they have to be treated so carefully that I don't finish my quilts like that. If they are machine quilted I can wash them in my front loading washing machine, and we can use them on the beds!
I went through the patterns from a few years ago when we also made 6" blocks and chose some that I thought would fit in an Oregon Trail quilt. I also found a few blocks on the internet to add.
All these blocks look like lots of work, just remember that it took me a year to sew all the blocks in my Oregon Trail quilt. I still haven't put all the blocks together. It just took me a long time to get all the photos and then post everything. Most months I only made the four blocks required for the class. There were a few months when I made a second set of four blocks so that my quilt would be bigger.
Tumbling Leaves. This is a directional block, it looks a little different depending on how you set them into the quilt.
You should be able to click on the image above and then right-click and save as to your computer.
Monkey Wrench.
You should be able to click on the image above and then right-click and save as to your computer.
Sawtooth Star
You should be able to click on the image above and then right-click and save as to your computer.
Joshua's Ladder, another directional block. I haven't decided how I am going to put this one together yet, but it will probably be this way.
You should be able to click on the image above and then right-click and save as to your computer.
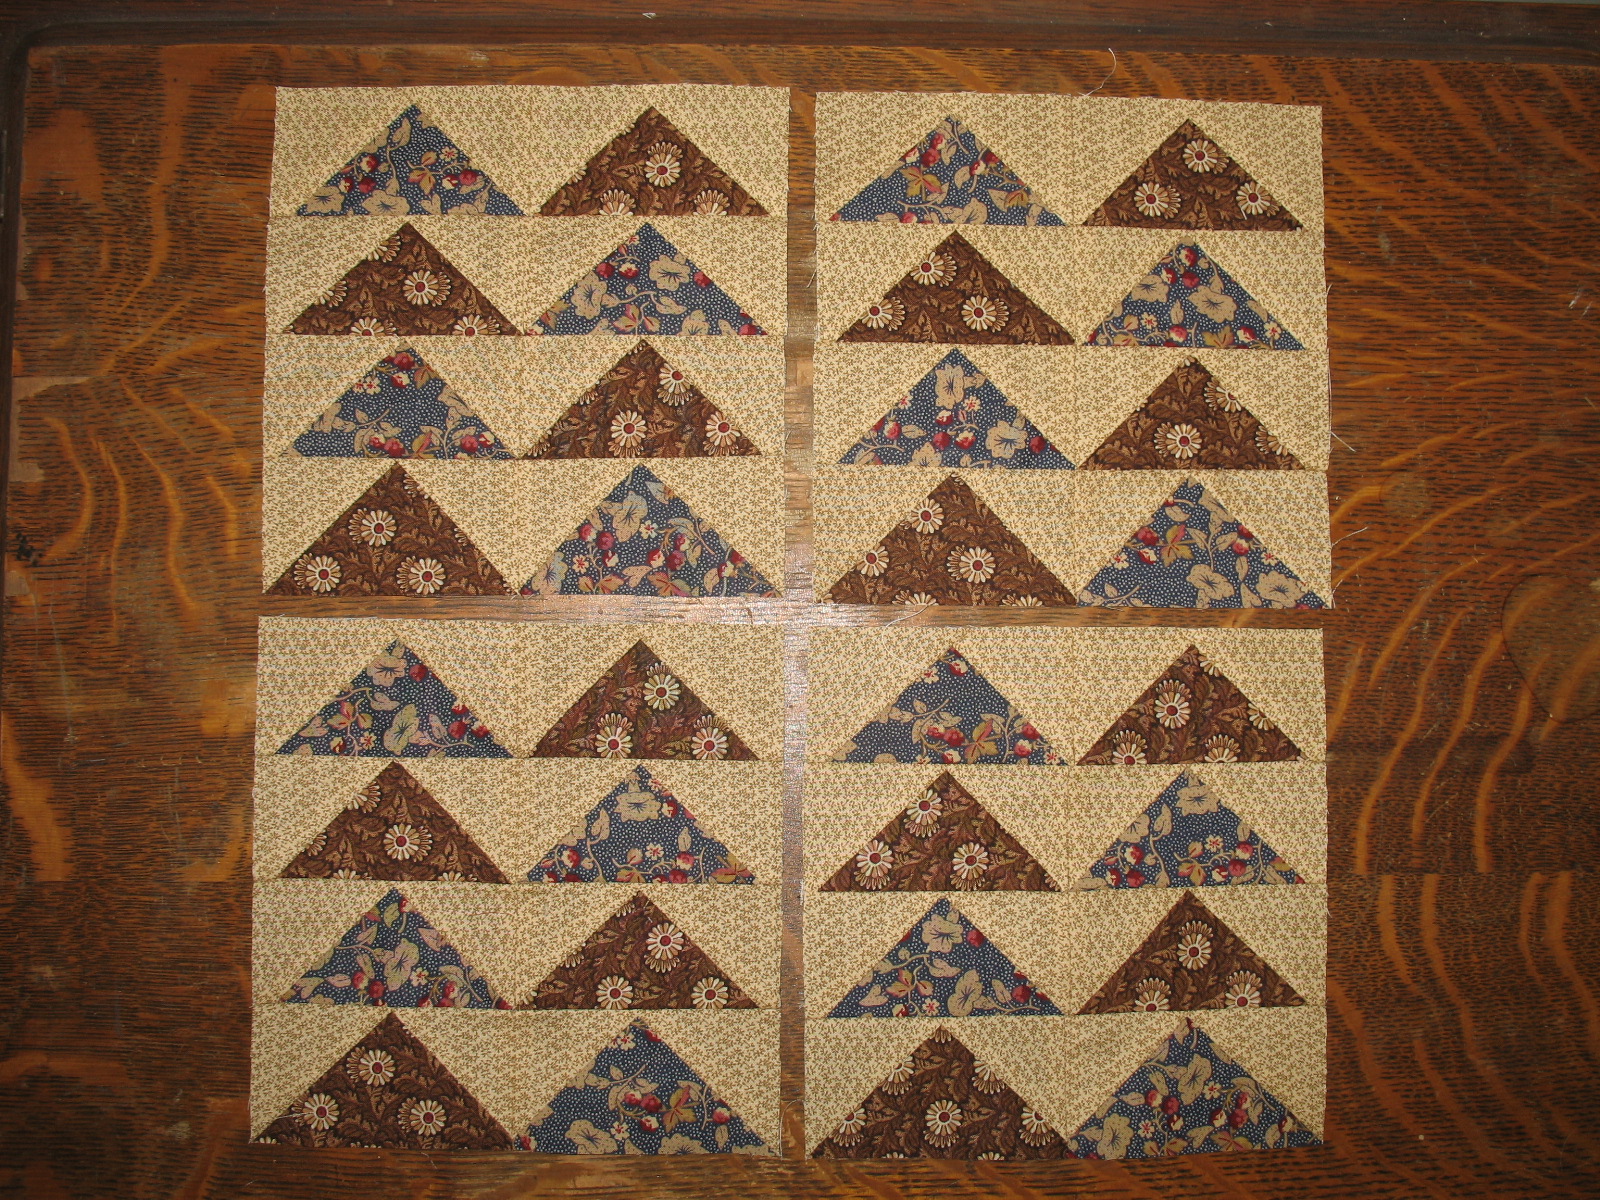
Flying Geese
You should be able to click on the image above and then right-click and save as to your computer.
North Wind, another directional block, sort of. I can't really imagine it being put together any other way.
You should be able to click on the image above and then right-click and save as to your computer.
North Wind is another block that I paper pieced. Here is the pattern I drafted. The directions above show a much easier way to make the block, but I really wanted to have the corner triangles solid, and the only way to do that accurately is to paper piece the pattern.
You should be able to click on the image above and then right-click and save as to your computer.
I rough cut the pieces for North Wind before I paper pieced it. It makes for a much more accurate and faster block than the cut-as-you-go method that I've used before.
That's all the blocks, except for the filler blocks that will go between the pattern blocks. As soon as I get my other projects to a point where I can sit and sew, I'll sew up the top and post a photo of that, too.
At the end of the journey, it would be time to build a log cabin, so that's the last block the quilt store gave us to do. I like paper piecing, and I like the center square of the log cabin to be the same size as the other strips, so I drafted a paper piecing pattern instead of using their directions.
Photo of finished blocks. This is the way I will put it into the final quilt. Since this is a directional block, it will look differently depending on how it is placed.
You should be able to click on the image above and then right-click and save as to your computer.
You should be able to click on the image above and then right-click and save as to your computer.
I rough cut the pieces for my log cabin and then paper pieced them. I don't cut as I go, I cut all the pieces at once, just like I do for a regular pieced block. It saves me time and frustration cutting them to a little larger than the piece in the block. Paper piecing gives very accurate blocks! I love it!
Prairie Queen took some time to stitch together. I strip pieced the small 4-patches used on the center sides of the block. That made it go faster than stitching together so many 1 1/2" squares! I also used a special ruler called a Triangle Square Up Ruler by Quilt in a Day. It made the corner half-square triangles very quick to piece.
This is a fairly old block. A Prairie Queen is a woman who lived, worked, and raised a family on the prairie.
Photo of finished Prairie Queen block.
You should be able to click on the image above and then right-click and save as to your computer.
I loved this block! I don't know if it is the colors or the pattern, but I like it either way!
The directions for the block are for two fabrics, I really wanted a third color since most of my blocks have three fabrics in them, so I used a different color for the center block and for the corner blocks. The half square triangles are made out of the two fabrics that the store provided.
Photo of the finished 6" blocks.
You should be able to click on the image above and then right-click and save as to your computer.
Not my favorite block, but the name works in with Oregon Trail, that's why they chose it. It looks quite a bit like Bear Paw, but the coloring is different and the 'paw' is solid on a Bear Paw. Here's the link to my Bear Paw blog entry.
Photo of the finished blocks.
You should be able to click on the image above and then right-click and save as to your computer.
If it had been me picking the patterns for the quilt instead of the quilt store, I would have chosen this version of Indian Mats found at Quilter's Cache. The rules of the "Free Block of the Month Class" are that you have to complete the quilt squares from the last month in order to get the kit for the next month for free.
I almost always get my blocks done, I think there has only been one time in 5 years that I haven't. If I don't particularly like the block pattern, then I don't add it to the quilt. But I always do the block because I almost always learn something while I am working on it.
Here is the new block this month. It is called Bear Paw. A very simple block, yipee!
One of the neat things about this block is that when you put four of them together you get very different designs. Just take a look at the three photos below and you will see what I mean.
This setting looks like four bear paws to me.
This setting looks like a cross or like a trail to me.
This setting looks like a sunburst to me. This is my favorite arrangement of the blocks. But that may change when I put it into the final quilt!
You should be able to click on the image above and then right-click and save as to your computer.
My photos show a bear paw that has three colors. Bear Paw blocks are usually two colors, but since all the other blocks we have been given are three-color blocks, I decided to add a third color to my block. Also, the first blocks all included red, so each of my blocks will include a red and have three colors in them.
Here is a link to step-by-step directions for a similar Bear Paw block: Craft and Fabric Links
I found a great video of someone else who unpicks seams the exact same way I do, with a rotary cutter! I thought this would be a great place to store the location.
The block for this month is called Prairie Flower.
Here are my completed blocks. Surprisingly, I was done by January 4th! The teacher said that since we had to cut out (64) 1 1/2" squares it would probably be best to not plan on sewing the block together the night before. So I started the day I got home and finished a few days later. I decided publish the blog post on the first Saturday of the month, just to be consistent.
Here are the instructions we received:
You should be able to click on the image above and then right-click and save as to your computer.
Of course Quilter's Cache has an excellent tutorial found here. However, their pattern makes a 9" finished block and I am sewing 6" finished blocks. So their step-by-step directions are excellent, but I am using the sizes that were given in our instructions.
And because I knew those tiny squares were going to give me grief, I decided to paper piece them. Here is the pattern I drew up for paper piecing the corners and middle-sides of the block:
Here are some helpful hints that I discovered while sewing this block:
The kit instructions say that we should have 45" of fabrics A, B, and C. My pieces were only 42". Instead of cutting the A1, B, and C pieces 1/4" bigger than the instructions, I was only able to cut A1 to 1 5/8" and the B and C (2 1/2") squares to 2 5/8" (I cut A2 to exactly 2 1/2" because it wasn't part of a smaller sub-block).
Cutting the A1, B, and C fabrics (excluding the center A2) as large as your fabric pieces will allow will let you trim each sub-block to exactly 2 1/2" making it much easier to finish the block to the correct measurements.
I found that I can pin all three pieces of each sub-block to the paper and then sew.
I have one directional fabric so I drew a line on my papers to show which way the direction of the fabric should go. That way when I pin I will get all the lines going in the same direction. Otherwise I would end up with more than half going one way and only a few going a different way. I would probably be the only one that would notice in the finished quilt, but as long as I recognized it as I was starting, I thought it would be best to take care in my pinning and sewing.
Yes, it does take longer to paper piece than to draw the lines on A1 and piece the traditional way. But my squares are turning out exactly 2 1/2" this way and I'm sure that I wouldn't get the sub-blocks to turn out as well if I used the traditional sewing instructions.
Here's a photo of some of the finished sub-blocks, some of the pinned blocks (from the back) and some of the fabric before pinning.
Clockwise from top left: finished corner sub-block sewn and trimmed, pinned sub-block, A1 squares ready to pin, papers ready for side-middle blocks, B squares ready to pin, pinned side-middle blocks ready to sew.
In the photo above I have already worked 1 1/2 hours on the blocks. The teacher was right when she said don't wait until the night before to start this block! It took me another 3 hours to finish the four blocks.
Here is the full text of the instructions I worked up for my friends.
Another month whizzed right by! I sewed these blocks this morning before class (and before we went out to milk) because I just didn't get to them over the holiday. I really like getting the next month's block kit free, so it is worth the time and effort to get the blocks done in time for class.
My completed blocks for the month.
It took about 1 1/2 hours to sew all four.
You should be able to click on the image above and then right-click and save as to your computer.
Instructions we received.
This block is known by a few names: Whirwind, Twin Sisters, Pinwheel, Waterwheel and Windmill.
Quilter's Cache has some good directions, but you can't use their sizes because the block will turn out to be a 12" square--too big for the quilt I am making. Use the sizes listed on the instructions above, but use the step-by-step directions provided at Quilter's Cache.
I also played a bit with a 6 1/2" Square in a Square for the setting blocks. I paper pieced it, but I was talking on the phone while I was piecing it so I didn't get all the pieces the right size. Oh well! I took good notes and I'll make a few more for next month to see how I like them.
You can see that this block didn't turn out exactly 6 1/2" square. I decided to use a light and two mediums for the setting blocks so they don't take away from the main blocks in the quilt.
Here are the instructions I drew up for the setting square.
Here are some good directions for paper piecing from Quilter's Cache. Yes, they have an amazing amount of resources on their site!
Another month has come and gone! I was able to finish another set of 4 quilt blocks. Sometimes I wonder if I will be able to get them done with so many other things that need to be done around here! I am glad to be busy. I know some people who say they are bored and I can't imagine being bored.
This block is called Wagon Tracks. Here is the pattern we received:
You should be able to click on the image above and then right-click and save as to your computer.
My finished blocks 'due' December 5th.
As usual, Quilter's Cache has a wonderful set of instructions, too.
These blocks took a bit longer to put together. It took me a bit more than two hours to sew all 4 blocks. I love the way they look in this arrangement. I'm still not sure how I will put the final quilt together. But there is no hurry to decide, this class lasts until August 2010!
We also had a short history lesson about pioneer wagons, wagon trains, and what the pioneers would carry with them across the plains. The thing that I had never heard of was a constitution for a wagon train. It made sense to have a plan and a contract of sorts that everyone in the party could agree to.
Here is the block that was 'due' in November so that we could get the next kit free:
It is called Farmer's Daughter.
Here are the pattern instructions we received in class:
You should be able to click on the image above and then right-click and save as to your computer.
It really wasn't too hard to do, which is great because I was so busy this month that I didn't finish my squares until this morning about an hour before class! It is made of 3 half-square triangles and a solid square, then edged with strips to make each block 6 1/2" (6" finished block).
Quilter's Cache has a pattern that is similar to the one we were given. You can find it here.
I have been very happy with the fabric and color choices that the store has chosen this year. The fabrics they have picked for their blocks are wonderful.
My last minute blocks! It took only about one hour to sew all four.
My friend got me started on another quilt. We are blessed in our area with a number of quilt stores that do a 'Free Block Club' and class. After you sign up for the class time you want to attend, you pay for the first kit that includes the pattern and fabric to make four blocks of the same pattern. If you get those four blocks done before the next class, the next kit is free!
This year's class is called Oregon Trail. The classes run each month from September through the following August. The quilt blocks will all have something to do with the pioneers that crossed the United States using the Oregon Trail. There are three different color-ways we could choose from: Neutrals, Reproduction 30's, and Reproduction 1860's. I chose the Reproduction 1860's fabric.
September's block is called Kansas Dugout. Although I did not use the pattern from Quilter's Cache, the site gives similar directions to the ones that I received at the store.
The pattern they gave us in class. You should be able to click on the image above and then right-click and save as to your computer.
Here is one of the photos they shared in class of a real Kansas Dugout. I can't put the photo in the blog entry because it would probably be copyright infringement. But the link above will take you to a photo you can look at. And here is another page with information about Prairie Dugouts. One of the fun things about the class is that they teach a mini-history lesson along with how to sew each block.
September 09, Kansas Dugout, Free Block Club and Class
Photo of my September blocks completed and ready for class!
Each month we will receive a new pattern and fabric to make the next four blocks. Hopefully I will be able to keep up and get my fabric and patterns for free! And I hope to post my progress each month, too.