Here is what our portable milker looks like, how we set it up, use it, and how we clean it.
The pump itself doesn't have a switch. It is plugged into this outlet strip so we can turn it on and off easily.
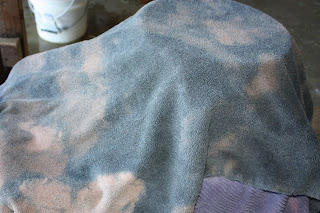
The pump is in this bucket with a towel wrapped around it to reduce noise. We used to put the pump outside the barn door each time we used the milker, but this keeps the noise down. Since we don't leave the milker on for long periods of time, I don't think it will over heat the air pump.
This is what the gasket looks like on the inside of the lid. The lip on the gasket is facing into the bucket, not into the lid.
Here is what the lid looks like when it is set up and ready to use with the goats. The double hose on the left of the lid goes into the inflations, one side into each inflation. The large hose right under the handle and heading out to the left also goes to the inflations. It carries the milk into the tank. The hose that goes down towards the bottom of the picture heads to the air pump. The double hose and the air pump hose both attach to the pulsator which cannot be submerged when being cleaned.
The pump has to be on before the infations are put on the goat's teats. If the inflations don't attach fairly quickly and you hear the pulsator working (you will hear a 'click, click, click, click'), then check all the hose connections, even the one on the pump. If any of the connections are loose, then the suction is reduced.
Once in a while, even when all the connections are intact and secure, the suction isn't enough. Check the gasket on the inside of the lid. Every once in a while I have to open the lid and just lift the gasket away slightly from the lid. Then replace the lid and, voila! suction again!
One of the brass connectors at the bottom of the inflations isn't as snug as the other one. After the doe is done being milked and we shut off the pump, we release the pressure by disconnecting the looser of the two connections. Then we gently pull the inflations off the doe's teats.
Cleaning Step 1
Check the tank to make sure that you emptied all the milk into the holding bucket before you start the rinsing and cleaning process. We've forgotten that a few times and end up having to throw out anywhere between 1/2 gallon to 2 1/2 gallons of milk depending on if we are weighing milk between does or just filling the tank with everyone's milk.
In the photo the bucket is set up with clean water and the inflations are submerged. This is the first cleaning step--rinsing the milk from the inflations, hoses, and inside the tank. Turn the pump on and suck the water out of the bucket.
Next we throw the water from the holding tank out into the dirt area in front of the barn.
Cleaning Step 2
Disconnect the hoses, brass fittings, and inflations. We leave the inflations attached to the double air hose because that hose never touches the milk, however, all the hoses are inside the bucket. Add about 1/4 cup chlorine dioxide, then fill the bucket with clean water and let everything soak for about 60 seconds. Chlorine dioxide will continue to work as long as there is a little yellow coloring to it. Most bacteria and viruses cannot survive 60 seconds in the solution.
Set the lid on top of the hoses, but don't submerge the pulsator (the gadget on top of the lid) or the hose connector (the part my finger is pointing at) under the water. Use a clean paper towel dipped into the bucket to wipe the handle and any other parts that shouldn't be submerged.
Re-attach all the hoses so you can suck all the chlorine dioxide from the bucket into the tank.
Wipe the inside of the tank with a clean paper towel after the chlorine dioxide has been taken up by the tank.
Swish the water and chlorine dioxide around in the tank and dump it into the dirt area in front of the barn. Rinse the outside of the tank with water from the hose.
Storage
Take the gasket out of the lid, place all the hoses, lid, and tank in the laundry basket that is lined with a towel.
Cover with another old towel. This allows the tank and hoses to dry without getting covered with dust or dirt.
Put the bucket in the old table by the water. Keep the chlorine dioxide stored out of the sun--it degrades very quickly in the daylight.
It takes me about 8-10 minutes to clean the milker and put it away.
All done!


2 comments:
That was good to see! I milk by hand but because I am getting older, at some point I will need a milker. Thanks for sharing!
I like to milk by hand, too. We have the milker because I have Carpal Tunnel Syndrome and the milker relieves some of the stress.
But.... I can't use the milker in the winter because we don't have a water heater in the barn. I can't imagine washing the milker with cold, winter water and then having it freeze in a big puddle by the barn.
Maybe one day we will have a 'milk house' with a water heater, sink, and hook-ups to the sewer (or a small septic field.)
Post a Comment