Wednesday, February 29, 2012

Better Than a Rubber Band on a Paint Can

Martha Stewart says to do this....
Source
I didn't have a rubber band that size in the house. And I could see me removing the rubber band....

and watching it fly across the room and landing on the window or a wall or the light fixture.... you get the idea.

This is what I came up with instead.
Duct tape.
First I put the tape across the top of the can. Then I used scissors to make four snips on the tape over the opening of the paint can.

I folded the pieces in the middle under.

This strengthens the tape a little more (as if Gorilla Tape needs strengthening) and gives me more room to get my brush into the paint can.

I've done this quite a few times now during the past two weeks of painting and it has worked well! If I'm careful, I can use it a few times before I have to throw away the tape.

Tuesday, February 28, 2012

Feeding the Yeast

I had to feed the natural yeast I got last week. It seemed to do really well. I haven't done anything with it yet... except feed it.

This is what my natural yeast looked like after growing for three days.  It smells really good, kinda sweet with only a very slight hint of sourdough smell.

Time to feed it! Add lukewarm water and stir. I added about 1/2 cup of water.

I added the same amount of fresh ground whole wheat flour. Fresh ground only because I didn't have any from the last batch of wheat I ground.

This is about the same thickness as the first batch that Mr. Warnock  mixed up for me. The jar is still a little less than half full of yeast.... or yeast mixture..... or whatever you call it.

This is about 1 hour after I fed the yeast. It has increased in bulk by a little less than half. It's bubbly and looks just like it's supposed to, as far as I can tell.

So far the yeast seems to be alive and well and growing. My first recipe will be pancakes since that seems the easiest to start with.

I'll let you know how it goes.

Monday, February 27, 2012

Corned Beef Update


Here's the corned beef just out of the brine. Not pink, I know, that's because I didn't use any 'pink salt' (sodium nitrite).

Onion, carrots, celery, corned beef, and the rest of the spices ready to cook in the crock pot. It looks yummy! And it smells wonderful!

Just finished cooking and ready to cut.
While I love cinnamon (and it was surprisingly tasty in the corned beef) it was a little too much cinnamon in this recipe.


The verdict: It was good. I'll probably make it again, but I'll use less cinnamon in the brine. 

Son1 liked it, too. He took the leftovers back up to school with him.

Friday, February 24, 2012

Natural Yeast?

Sheepy sent me a link to a radio program that talked about natural yeast, something I've never heard of before. (Self-Reliant Living by Preparedness Radio hopefully the link will be active for a little while. I've heard that the owners of the site don't always leave it up for free, so download the program if you don't have 90 minutes to listen to it.)

Sheepy knows I can't eat wheat because I'm gluten intolerant, but there are some people like me who can eat bread made with this kind of yeast.

It sounded so interesting that I listened to the 90 minute program the next day.

By that evening I had contacted the author of the book and picked up a natural yeast start. It's sitting on my counter growing. Apparently this strain of yeast is about 200 years old. That's old.

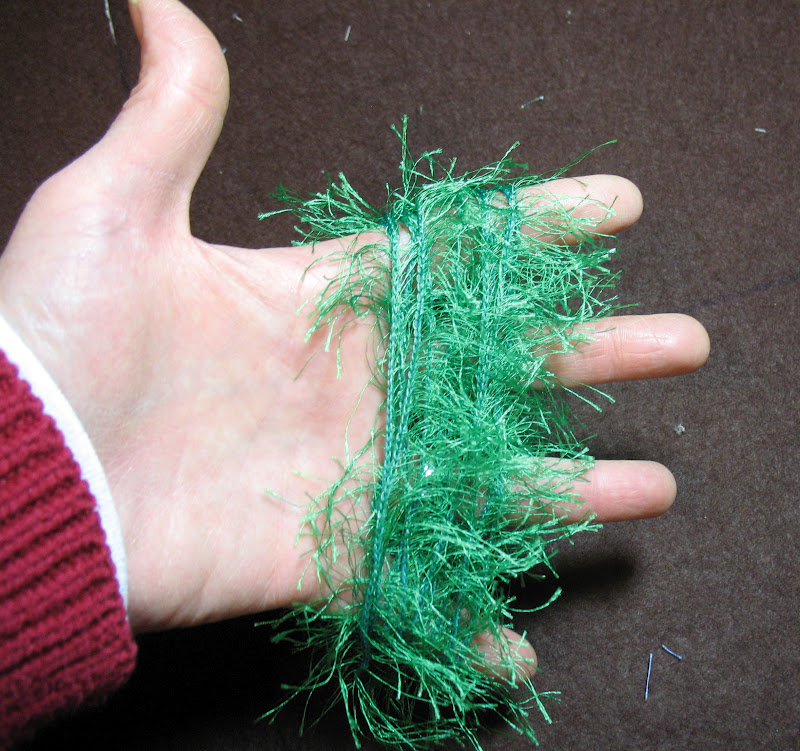
This is what it looks like this morning.
Nice and bubbly, just like it is supposed to look.
Natural yeast is very different from quick-rise yeasts that you buy in the grocery store. The way it acts on wheat is different, too. Apparently there have a been a few university studies done that show that this breads made with this type of yeast do an amazing job controlling your glycemic index. That's really important to Sheepy since her hubby has diabetes.

Caleb Warnock has a blog here. He doesn't talk much about natural yeast on his blog, but he has some good ideas about gardening and being more self reliant. He's also an authro and hosts writing workshops and classes in our area. Nice guy, too!

I bought a copy of his book from him last night, too, which he graciously signed. It's called the Forgotten Skills of Self-Sufficiency. It's a great introduction to self-sufficiency skills, it doesn't go into too much depth, but gives some good ideas on how to begin to grow gardens, keep chickens, and use natural yeast.

I haven't explored the Original Fast Foods site much at all, but Mr. Warnock gives their site as a reference in his book. The link to a discussion about the history of quick rise yeast can be found here.

For the next few days I'll leave my start on the counter, feed it, and watch it grow. If I can get a little more comfortable with the whole idea of using 1 1/2 cups of yeast starter in a batch of bread, then I'll give it a try next week and let you know how it goes.

Sheepy tried it. Her first batch of bread was great! But the next four batches went to the chickens (sad day!) So my job is to give this stuff a try and keep a 'lab notebook' (aka blog) to chronicle the successes and failures of using it.

Here is a video I found about starting your own yeast from raisins:


Sheepy told me she found a site somewhere on the internet that showed a woman who made all sorts of bread from different fruit starts. In the interview listed above Mr. Warnock mentions that the white-ish film on the outside of grapes and other fruits is yeast, so it makes sense (sort of) that you can grow yeast starts from fruit. Here's a blog I found that seems to show the process Sheepy was telling me about. Bread and Original Yeast. I've got alot of exploring and reading to do on that site!

If you've used this type of starter, please comment below and share some links! I'm sure there are great sites tucked in hidden spots on the internet that I haven't found yet.

Monday, February 20, 2012

Corned Beef

Sheepy made Corned Beef last week. She said she LOVED it. Then she smoked the leftovers and it turned into Pastrami!

She sent me the recipe from here (Michael Ruhlman), asked me to try it and post about it because she looses lots of links--but not mine.

I love corned beef so of course I wanted to give it a try. Son1 loves corned beef, too, and he'll be here for the weekend.

This is a 5 day process, so it's not fast. It will be ready to cook when Son1 is here.

I'll let you know how it turns out.

Here is all the prep work.

Making the Pickling Spice
 I used Michael's recipe, which he posted from a book he co-wrote called: Charcuterie: The Craft of Salting, Smoking, and Curing (it's on my wish list, now.)

I couldn't find any coriander seeds, mace, or cinnamon sticks at the store. My pickling spice doesn't have coriander or mace, but I added ground cinnamon after I toasted the other spices.
Toasting the spices was easier than I thought and only took about 5 minutes. It smelled wonderful!
Next grind up the toasted spices. My mortar and pestle are small so I did it in three batches. I almost plopped the whole batch in the blender instead and pulsed it, but I decided to grind it by hand so the chunks would be a bit bigger.

Making the Brine
I only found a small roast so I did a half batch of brine. Clockwise from the top: 2 tablespoons pickling spice, 1/4 cup sugar, 3/4 cup kosher salt (non-iodized), and 3 garlic cloves crushed (that's twice the amount that the recipe calls for, but we love garlic!)
Add 1/2 gallon of water and bring to a simmer to dissolve the sugar and salt. (I don't have sodium nitrite - pink salt- right now. Hubby is recrystallizing some from the lab so if it gets done in the next day or two, I'll add it to the brine. It isn't a necessary ingredient, so I didn't feel too bad about leaving that one out.)
Let it sit on the counter until the brine is room temperature. I only have one big pot so I transferred the brine into a stoneware bowl.
Put in a beef brisket (I couldn't find one at the store, so I used a roast. Too bad because he said that this works best with cheaper cuts of meat). Put a plate on top to keep the meat submerged. Cover and refrigerate.....
for 5 days!!

It's sitting in the garage fridge right now.

I can hardly wait until Saturday to cook it and see what it tastes like!

Saturday, February 11, 2012

Clothes Clip Matching

This is just one of my random posts, not really a farming or homemaking post. But it was fun and I will probably end up adapting it to another use sometime.

Color Matching Clothes Clip Game
All my kids are grown (pretty much). I loved making and creating educational toys or games when they were younger and I kinda miss it.

Enter CooleyBug and her family! Yay!

I found this great idea here on Tot School and thought I could do this!

Then, after thinking for a while, I thought that this might not be enough for the little one that is almost in Kindergarden.

So I added ABC matching on the back of the clips.
Since the front of the clips match colors, this is an easy way for the older one to 'check' her work. If the colors match on the other side of the ABCs, then she got the answers right.

Unfortunately I started this project before breakfast, I should have put the color on the clip side instead of the handle side. Oh, well!

Blondie uses clothes clips in her 3rd grade classroom as a way to check attendance, if the child wants to buy lunch that day, and as a behavior reward.

I think I might make a set of these for her next year so that each child can have a different color clip. It would also be an easy way to divide the kids into groups (all the yellows get together to read over in that corner...)

I think I'd like a few on my fridge that have a magnet on the back to hold notes and lists and quotes. I would probably put the color along the whole length of the clip because that would probably look better.

I didn't add the color from the paint chip all the way along the clip on the matching game because I only wanted to use one set of paint chips from the store, not two.

Here's another idea I came up with. It is NOT well executed at all because I spent about 5 minutes on it. But it might get someone's creative juices flowing!


It was a fun, quick, and inexpensive project.

I love those!

Sunday, February 5, 2012

Dammit Doll Tutorial

I've been making a few of these for friends and neighbors who are having a frustrating time this winter. It's brought a smile to almost everyone's face!

You can purchase them on a number of sites on the web, or you can make your own. You can do a google search for the poem, too, although I've included it at the end of this post to make it more convenient.

This one is for my sister, she asked for a red one!
Print out the pattern above. There is a 1" test square so you can adjust your printer, but it doesn't matter that much. The dolls can be any size.
If you normally sew alot, the pattern is probably all you need. If you want to see how I do the hair, it's shown at the end of the post.

Pin your pattern and cut out with scissors. I'm a fan of rotary cutters, but not when the curves are this tight!
All cut out. Transfer the marks to the upper arm so you don't sew there.
Dammit! I forgot to sew on the face before I started sewing! It's easiest to sew the eyes and mouth on before you sew the doll together. You can do it after, no worries, but it's easier when you don't have to bury the knot.
Set your stitch length to 1.5 (or whatever a small stitch length is on your machine). It makes it easier to sew around the curves smoothly.
Sew all the way around the doll and clip the seams. You can see the little clips on the inside seams. I clip everywhere there is an inside seam so rounded seams are smoother when you are done stuffing. I also trim really close to the outside curving seams (you can see how close I clipped the seam around the head.)
Turn it right side out. I use a tube to help turning it right side out, but using a dowel or the eraser end of a pencil works fine, too.
Stuff! I use some poly fill, but you can take apart an old stuffed animal and re-use the stuffing, or use pieces of quilt batting.
The photos I took of stitching up the open seam were terrible! Sorry about that. Do the neatest job you can sewing up the seam.

Now for the Hair
Wrap about 10 wraps of Lion Brand Fun Fur (or whatever yarn you have in your stash) around you hand. The more open your hand is, the longer the strands of 'hair' you will have. 
Slip the yarn off your hand and use your sewing machine on a straight stitch to sew right through the middle of your yarn.
Sorry about the fuzzy photo, if you look closely you can see the white stitching line that goes through the yarn to secure it.
Hand stitch the hair in place along the stitching line on the yarn. This isn't some wonderfully, fantastic doll, it's supposed to be whacked! Don't worry about perfection on this one!
Sometimes I trim the hair, sometimes I don't. This doll's hair was sooooo wonky and long that I trimmed it to make it look better.

 The Poem Tag
Crumple up a piece of paper bag.
Iron it flat, but not too flat.
Print out the poem, rip around the edges (poem is below).
Coat both the paper bag and the poem with a thin layer of rubber cement and let it dry.
Then put the poem on the rubber cement.
Rub the extra rubber cement off the brown paper bag.
Rip close to edges of the poem, punch a hole, add some twine, and the tag is done!
Click on the photo, then download and print.

I took longer to take the photos and write the post than it did to make the doll. It's a pretty quick project.

Honestly, I hope you don't need one! And that no one you know needs one! But just in case you do, it's a fast, fun project to make.

Wednesday, February 1, 2012

Kitchen Demolition

The kitchen demolition started today. The cabinet guys wanted to come and do a final measurement on the cabinets, but the dropped ceiling had to be out before they measure.

So, the shed doors are put on hold while Our Good Friend worked on taking out the dropped ceiling.

We weren't really sure what was under there, but had an idea that it was put in after the house was built and not during original construction.

We were mostly right on that, you can see what I mean in the photos.

I love those plastic buckets! They stack and store and are easy to clean. I have all of my upper cupboards stored in five of them. (I'm not kidding!)

It took me about an hour to take everything in the upper cupboards out and everything off the walls and counters.
Everything is stored in buckets, on the kitchen table (under a sheet) and in Son1's room. Not much is in his room, though. The frame was around the light box in the dropped ceiling. I'm saving it for now, I'm not sure what I'll do with it, but I'll think of something!
I even remembered to cover the computer with a sheet!
Demolition begins! Out comes the dropped ceiling!
Just as we suspected, the dropped ceiling was added after the house was built so the original textured ceiling is still there! Yay!
Unfortunately, the original builders built in some soffits so the cabinets wouldn't have an open space above them. It saves on cleaning the upper cabinets, so I would have chosen to do the same.

The soffit is framed in with 2x4s and plywood. It took Our Good Friend longer to get the soffit out than it did to take out the rest of the dropped ceiling.
All the soffit is out! The insulation is from the attic, yup, the attic.
This part will have to be patched with new wall board. The wire hanging was from the old light that was above the sink. It's switched, and we will move the wiring so we can eventually install under cabinet lights.
Soffit area shoved full of insulation.

Before the house was remodeled (so the neighbors say) this was a door to the driveway. I love kitchen doors, but I'm not re-installing one here. I'd rather have the counter space!
Our Good Friend and Vet2Be put sheetrock up into the spots that the soffit left.
They had to cut holes for these wires to go through. The original electrician was a bit lazy and decided that since the soffit was there, he didn't have to drill holes to put the wires through, he could just lay them through the soffit. When Hubby saw that, he decided that we are getting an electrician to come in and re-wire this area so that the wires go where they are supposed to go, and the new cabinets can go to the ceiling.
The electrician will also take care of this wire. It went through the dropped ceiling and powers a light on the drive way. Whoever put in the dropped ceiling didn't want to run the wire through the attic......

They wanted to pull it out of the box in the ceiling and run it through the dropped ceiling--after all, who would want to pull out such a lovely dropped ceiling and make the kitchen feel BIGGER?!
This is what it looks like tonight. All the upper cabinets out (some will be re-used in Spunky's home that is being rented right now. I copied her color, so the cabinets are not the same style, but they are the same color!)
So far we haven't hit any huge problems. We weren't expecting to hire an electrician to re-wire, but that's okay. Every remodeling project takes 20% more time and 20% more budget than expected. It's the law of remodeling!