I haven't made alot of cheddar. I've had only 3 batches turn out well, which I've been really happy about! I was about to give up after 4 failed batches. I'm glad I had so much milk I decided to give it another try.
The last time I made cheddar I decided keep track of how long it took me to get it to the pressing stage. It takes me about 5-6 hours to get it from milk into the press, not a quick cheese! This is going to be a loooooong post with lots and lots of photos!
I am using the recipe on page 104-105 of Home Cheese Making by Ricki Carroll.
I pasteurized 2 gallons of goat milk. I used the pasteurizer that Sheepy gave me. One thing I love about having a pasteurizer is that I don't have to stand at the stove and stir the milk until it reaches the right temperature. Here is the post about my pasteurizer. Why pasteurize? Because we can eat the cheese in one month! If I use raw milk then we have to age the cheese for two months.
Step 1 (From Home Cheese Making)
 |
| I prepared a bunch of mesophilic starter in July. I keep it in a vacuum sealed bag in the freezer. When I need some, I take out one ice cube for every ounce of starter called for in the recipe. |
 |
| We have goats, so this is 2 gallons of goat milk at about 85˚ F. You can see the frozen starter cubes floating in the milk. |
So, while I'm waiting, I'm blogging! I am not an expert cheesemaker. I've had lots of batches of cheese that have been fed to the chickens or ended up in the garden. Vet2Be has 4 milk goats, so there are days when we are swimming in milk. It gives me the freedom to experiment a little and learn alot!
My favorite cheesemaking book is Home Cheese Making by Ricki Carroll. I love New England Cheesemaking Supply (where I purchased the book). They are really friendly, have answered all my email questions, and they have a great cheesemaking blog!
Step 2 (from Home Cheese Making)
Adding the rennet.
 |
| 1/2 teaspoon rennet in 1/4 cup cool, unchlorinated water. |
 |
| I don't have a nice slotted spoon for cheesemaking, but I found a skimmer that works for most things. |
More waiting. Set the timer for another 45 minutes. I usually plan on cleaning house the same day I try to make cheese. I can get alot done (vacuuming, cleaning bathrooms, sorting and folding laundry....) in 45 minute chunks. I hate house cleaning, so I love knowing I only have to clean for 45 minutes, then I can have a break. Sometimes I'll start a batch of yogurt or chevre during the sitting times, too. It depends on how much milk is in the fridge. Right now there is 6 1/2 gallons in the 'milk fridge' and 1/2 gallon in the house fridge. That doesn't include the 2 gallons on the stove waiting for the curd to form.
I always worry at this point if I will get a clean break in the curd. Most of the time I do. So, here's hoping for another! If not, then I'll let it sit a little longer. If it still doesn't break cleanly, then you get to see that I don't mind making mistakes.
A Clean Break
 |
| Yay!!! A clean break! I don't know if I will ever get tired of seeing that curd break cleanly. |
Cut the curd into 1/2" pieces. Well, sometimes that is a bit tricky for me. The curd slurps around the pot and some curds are wider than others.
 |
| I start in the middle of the pot and work my way towards one side, then I go back to the middle and work my way towards the other side. If I start on one side and go straight across, I get really uneven curds. |
 |
| Then I cut the other direction, starting in the middle and working my way towards one side. Then starting in the middle ans working my way to the other side. |
 | ||
| Now there are all these long, thin curds. To get them into a cube shape I take a spoon, dip it into the center of the pot, then push it towards the edge. I start a little below the surface and make one layer. Then I go down another little bit and make another layer.... I keep doing that until I reach the bottom. |
Before you start this step make sure you have comfortable shoes on or you will end up with sore feet. You'll be standing in front of the stove stirring for 30 minutes or longer. Don't hurry this part, just put some enjoyable music on or a book on tape or something to keep your mind busy while you are standing there stirring.
I don't follow the all the directions from the book on how to raise the temperature. We live in the desert and I feel really guilty if I don't make good use of whatever water I use. Dumping water down the drain isn't something I consider a 'good use'. So, instead of putting my pot of curds and whey into a big bowl of warm water, I set up the stove with a round cake cooling rack on top of the heating element.
 |
| I have a flat surface stove so this works very well for me. |
 |
| Here is the pot sitting on top of the cake cooling rack. This way the pot doesn't sit directly on the heat. |
 |
| My starting temperature today. Sometimes it is little higher, sometimes it is a bit lower. |
I set the timer on the stove for 5 minutes, watch my temperature, and stir. Then repeat, and repeat....
 |
| Because I'm still new to making cheese I often get big or long curds. You can see some on the spoon above. I gently use the edge of the spoon to push through the curd to 'cut' it into smaller pieces. I have found big curds as late as 15 minutes after starting the 'cheddaring' process. |
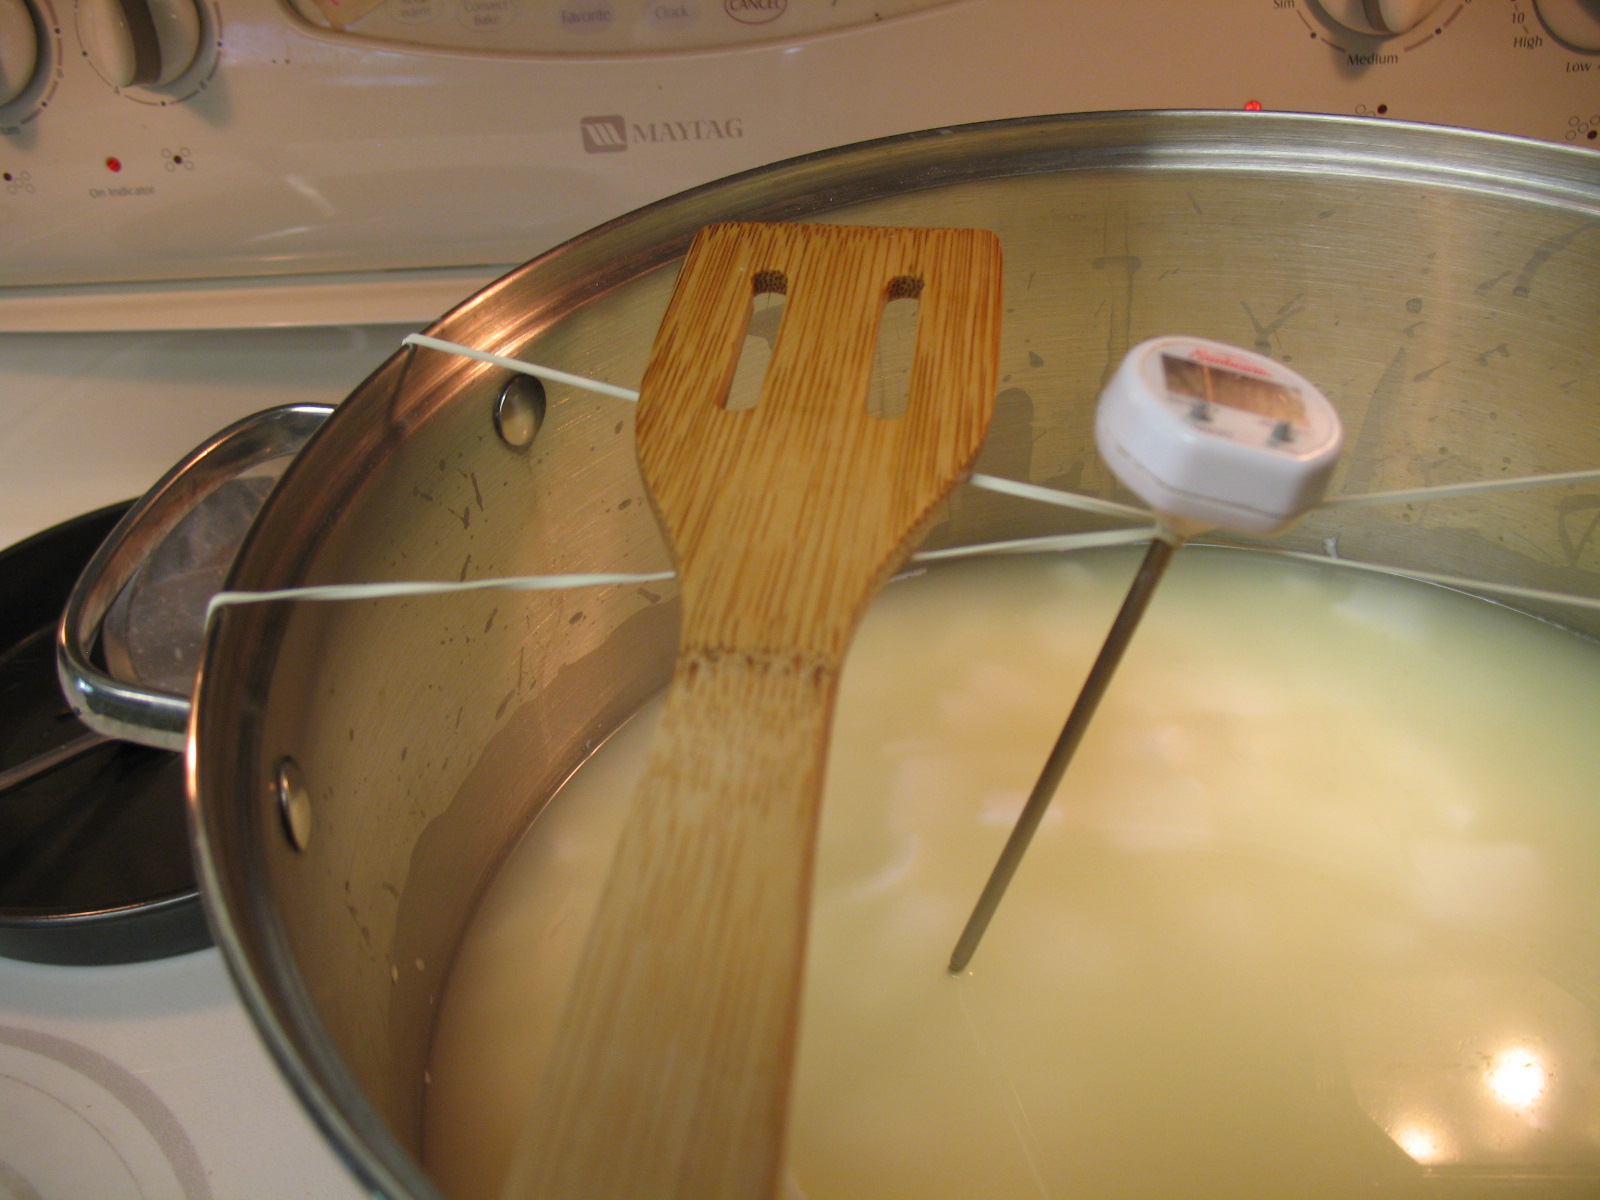 | |
| I use two or three rubber bands for my thermometer to hang on. It also makes a nice spoon rest while I take a picture! |
 |
| You can see how the curds are shrinking in size. This is about 15 minutes into the cheddaring process. |
Step 5 (From Home Cheese Making)
I reached 100˚ F, the target temperature for the curds to reach. I'm not sure how long it took me, but I think it was a little quicker than it should have been.Now the curds have to rest for about 5 minutes. While they are resting, I set up the colander over my milk pail in the sink and line it with cheesecloth.
 |
| I do everything messy in the sink! |
 |
| Lined with cheesecloth. |
 |
| I love the way the curds look all shiny in the colander! |
 |
| The cider press sits right next to my desk, which is filled with music that I am arranging for my guitar students. You can see the whey dripping into the pot. It will slow down in a little while. But it is fun to hear it dripping while I am typing this. |
 |
| 6.75 |
 |
| Yum! This is what the curd looks like after it has hung for an hour. I think I should have let it hang a bit longer--it is kinda 'juicy' this time. I usually don't have finger marks in it, but I almost dropped it on the floor. Good catch! |
 |
| I didn't really understand this step until I saw other photos on the internet. I wondered what 'walnut sized pieces' meant. Did it mean the whole walnut, or the nut after it is out of the shell? Turns out it is the walnut after it is out of the shell. |
Step 7 (From Home Cheese Making)
 |
| Pack the cheese into a mold. This time there were more curds than normal. I think that is because the cheese had more whey in it than it usually does after it hangs. |
After I packed it into the mold, I put it in the cheese press with 10 lbs of weight on it. Then after 10 minutes, I took the curds out of the mold and the cheesecloth, turned the cheese upside down, and put it back into the cheesecloth and the mold.
It said to press it for another 10 minutes under 20lbs, but I've had better luck with 10 lbs for another 10 minutes. My cheese doesn't turn out quite as dry that way.
I had to let it sit there for an hour--it was time to milk and we were already 30 minutes late getting out.
 |
| When I take the cheese out of the mold, flip it, and re-dress it, I tug at the cheesecloth to smooth it out along the sides and the bottom. I use a clean, dry piece of cheesecloth (butter muslin) for this step. I can flip my mold over and check to see if there are any wrinkles, some molds have a bottom and you can't check for wrinkles. It won't go into the press this direction, I'll flip it so the loose part of the cheesecloth is coming out the top. |
 |
| Here it is re-dressed again in a clean cloth and under 25 lbs. The recipe says 50 lbs, but I have had better results with less weight. It will sit on the counter until tomorrow. The recipe says 12 hours, and by the time I get to it, it is usually a little longer than that. |
Tomorrow morning I'll take it out of the mold and let it dry on some sushi mats for a few days before I vacuum seal it and put it in the wine cooler in the storage room.
Now it's your turn, Sheepy! Give it a try!
2 comments:
That is great!
Thanks! I hope you give it a try!
Post a Comment